
Users have the ability to add DNS service either directly from our homepage (www.easydns.com) or from within their easyDNS account. Both options will take the user through the same signup funnel.
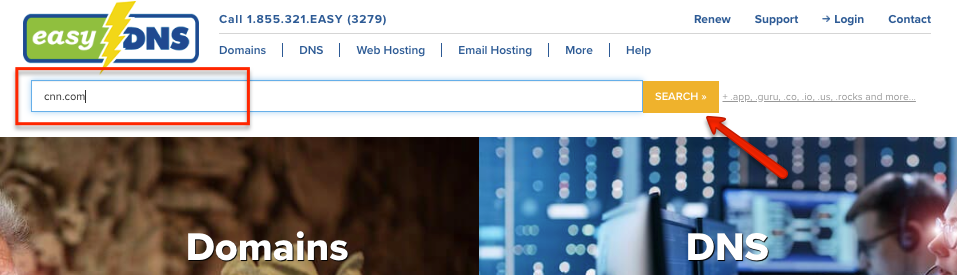
If choosing to add DNS service via our homepage, you’ll want to set it up so it looks like the following:
1. Enter your domain and click SEARCH.
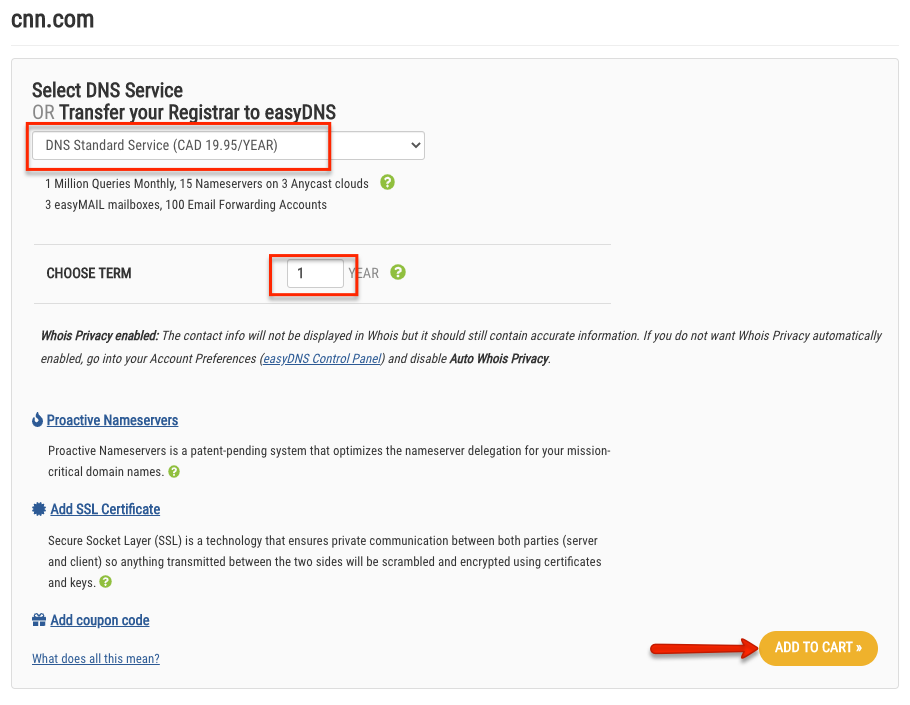
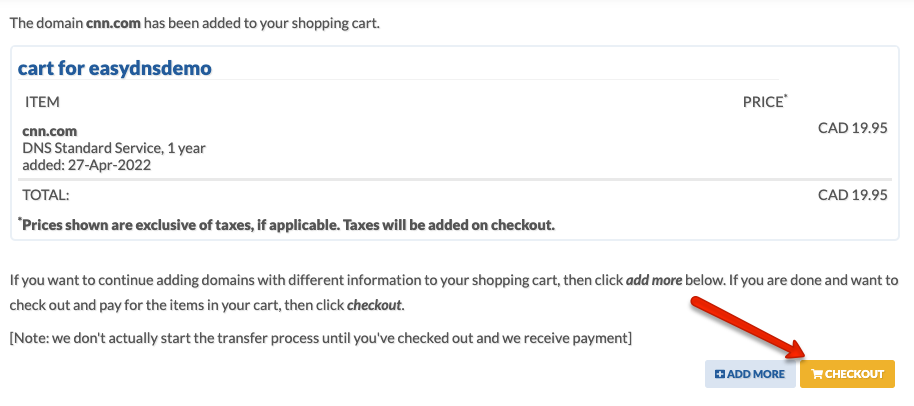
2. Select your service level, term, and click on ADD TO CART.
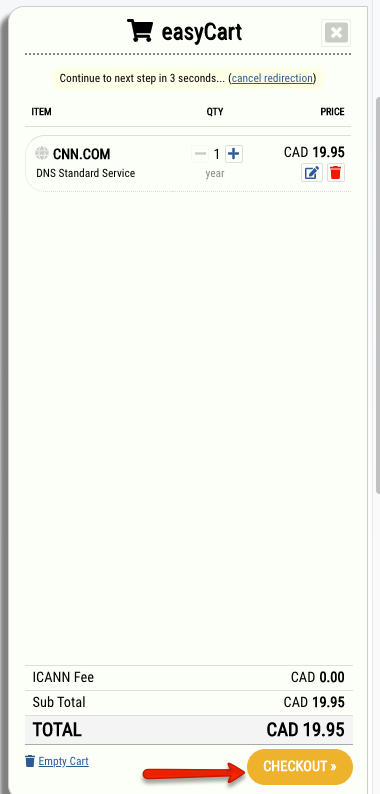
3. Click on CHECKOUT.
If adding DNS service from within your easyDNS account, you’ll want to do the following:
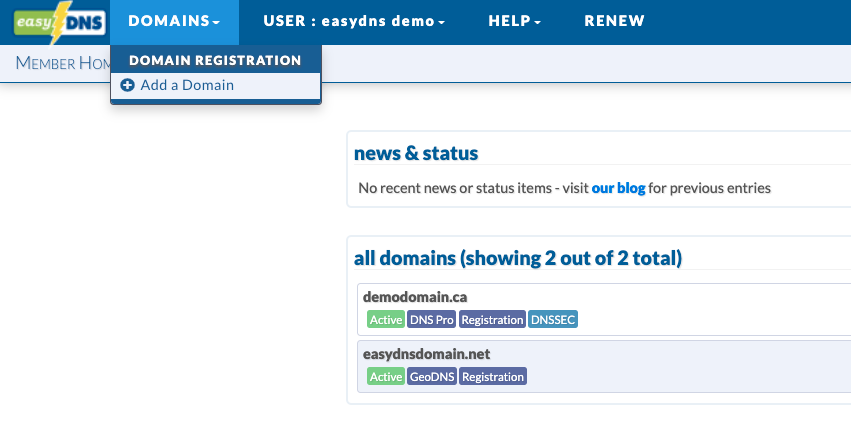
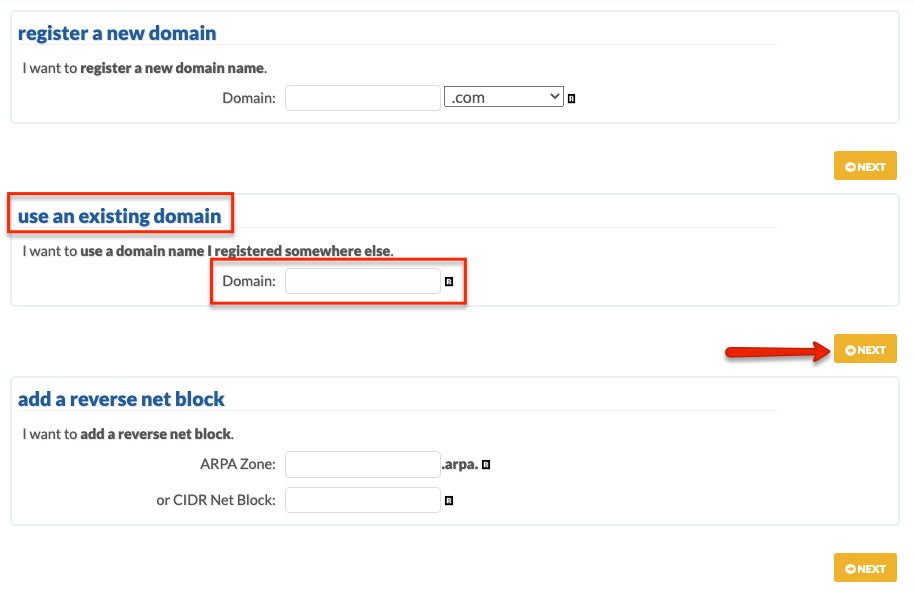
1. Log into your easyDNS account.
2. Click on ADD A DOMAIN.
3. Enter the domain name under USE AN EXISTING DOMAIN and click NEXT.
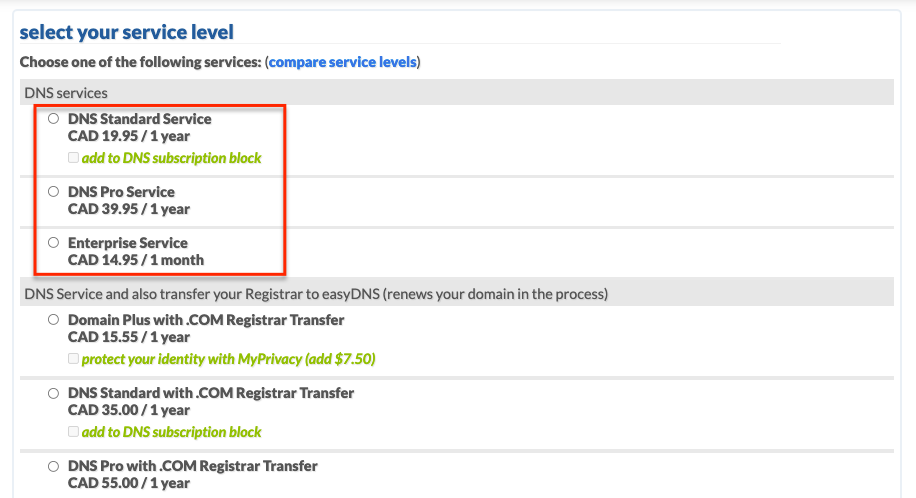
4. Choose your service level and click NEXT.
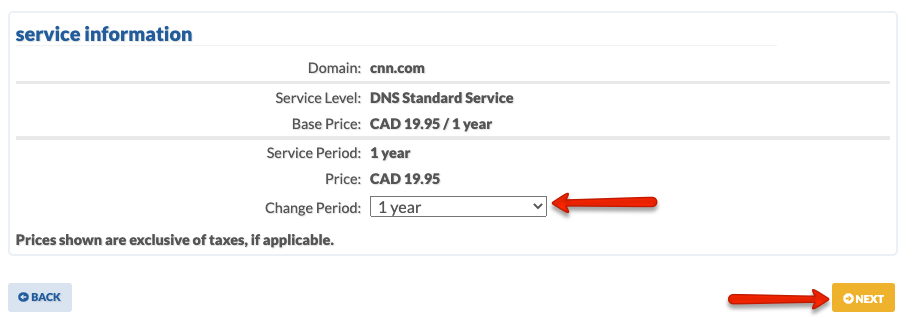
5. Choose your term and click on NEXT.
6. Click on NEXT to upload your zone file later or click on CHOOSE FILE to upload your zone file now.
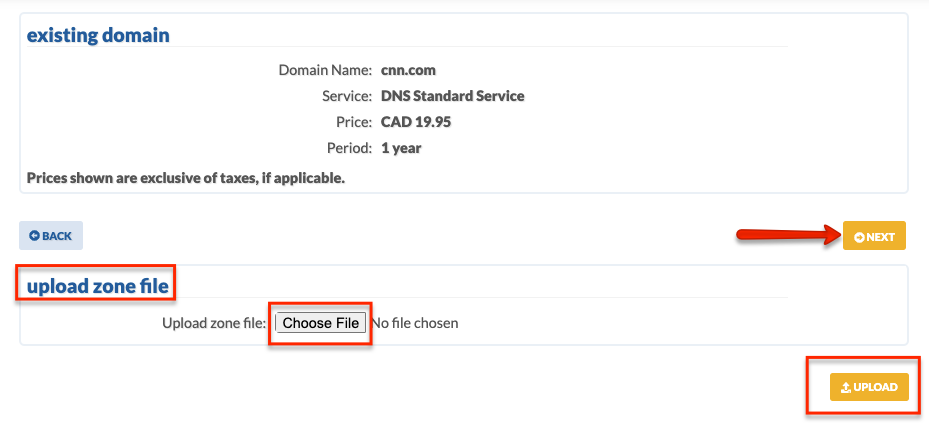
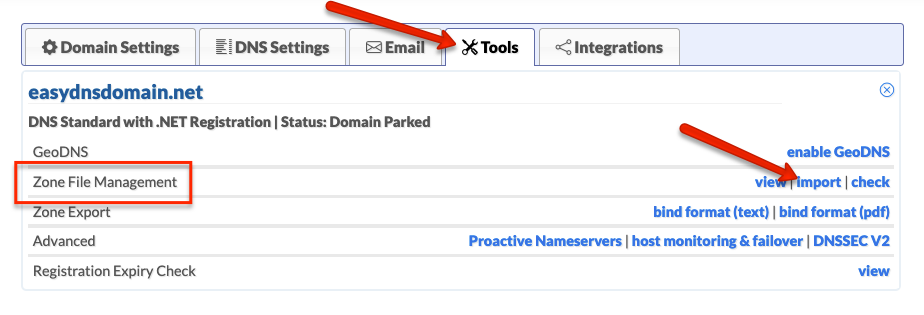
If you choose to upload your zone later you can do so through our IMPORT tool.
7. Click on CHECKOUT to generate your invoice.
Once paid, the domain will appear within your account and you will receive an automated email with the name servers you should be delegated to. If you are unsure of what servers you should be using please see our tutorial HERE.
To ensure a seamless transition with no downtime, make sure to put in your DNS entries within your easyDNS account BEFORE you delegate to our servers. If you would like us to do this for you please provide us a plain text format of all your zone records (you get this through your current DNS provider) through an EASY-DOES.IT request.