NOTE: Because of the constant updates to third party mail clients/devices, the images used in this tutorial may not coincide with what you see. Please use this tutorial as a general guideline and refer to your mail client’s help documentation for further guidance.
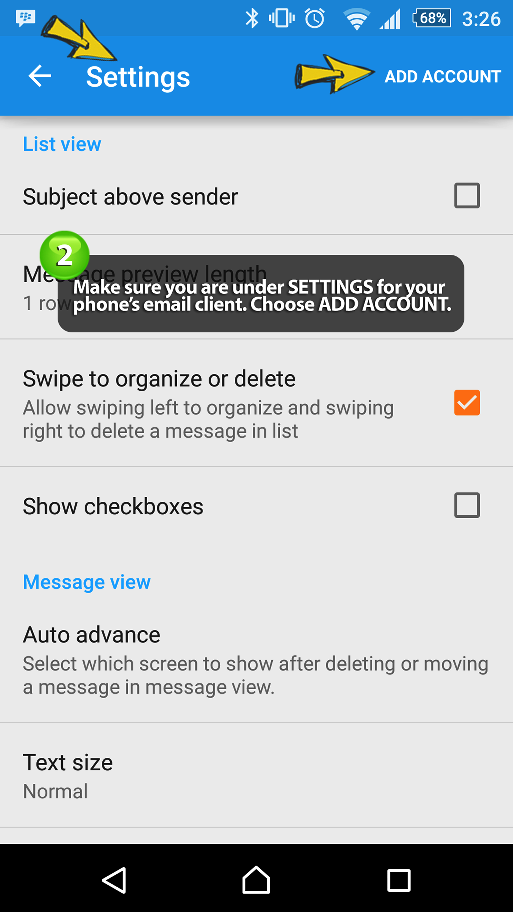
1. Open your phone’s email client and choose SETTINGS
2. Choose ADD ACCOUNT
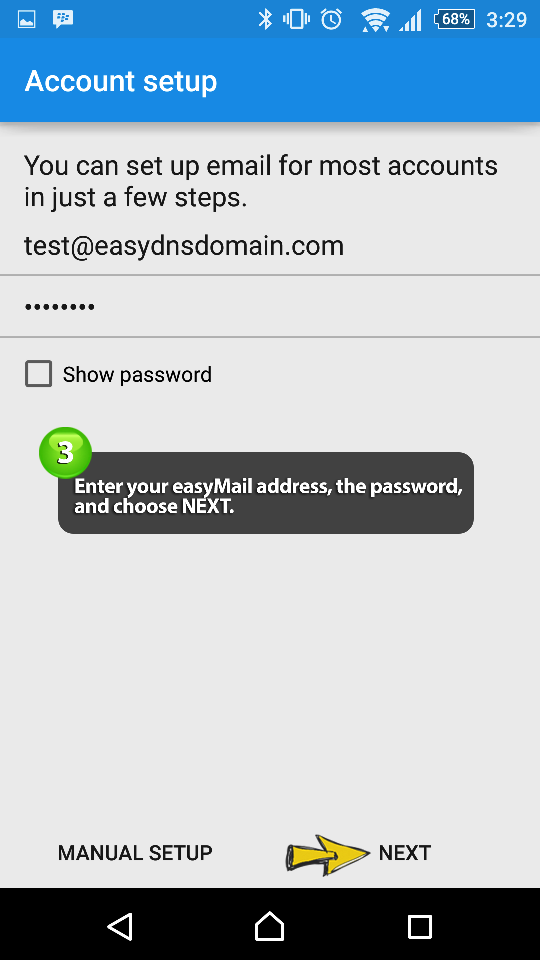
3. Enter your easyMail address, the corresponding password, and choose NEXT
4. Choose either IMAP *OR* POP3
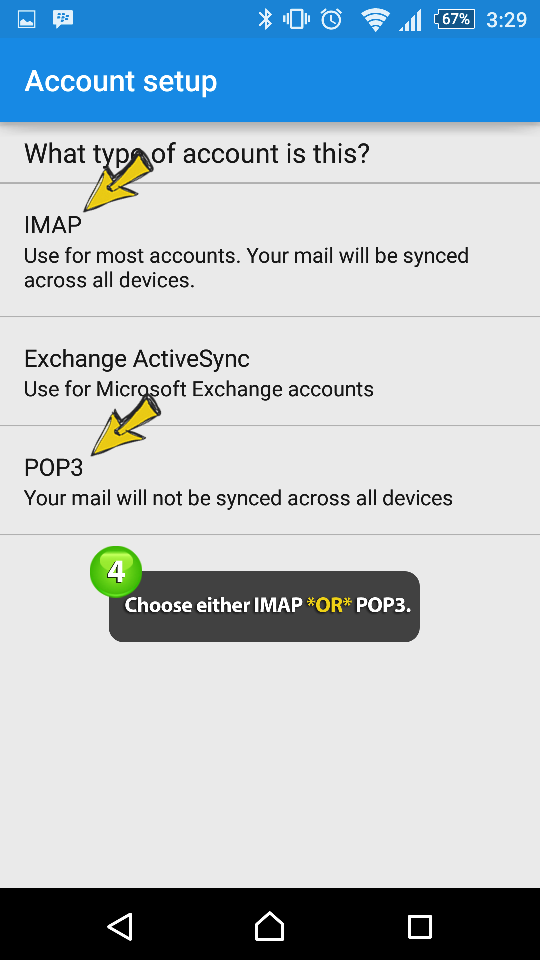
NOTE: We recommend using IMAP when setting up your email on third party devices. For more information on the difference between the two, please click here.
5. Under IMAP SERVER, enter imap.easymail.ca and choose NEXT
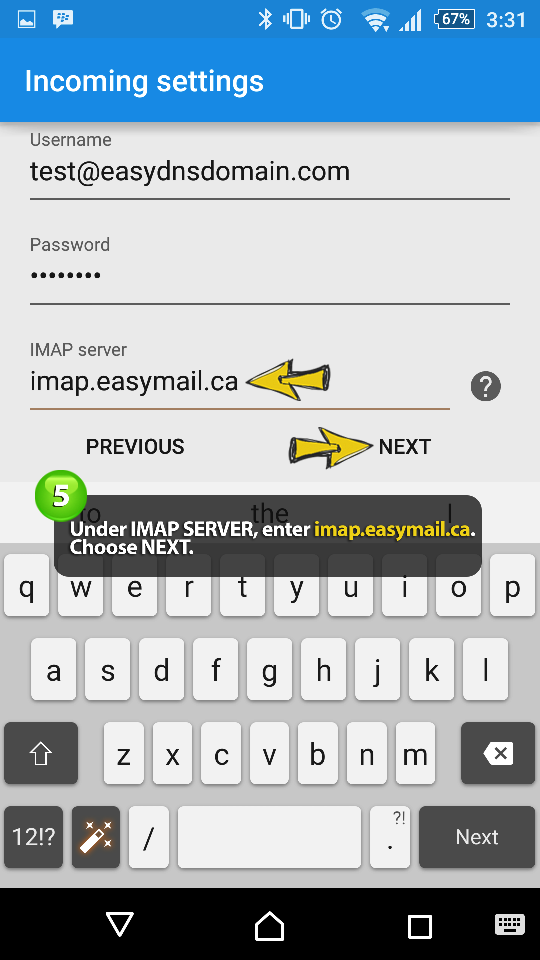
NOTE: If you chose POP3 protocol, then enter pop.easymail.ca.
NOTE: For SECURITY TYPE we recommend SSL/TLS. The PORT should fill in automatically.
6. Under SMTP SERVER, enter mailout.easymail.ca and choose NEXT
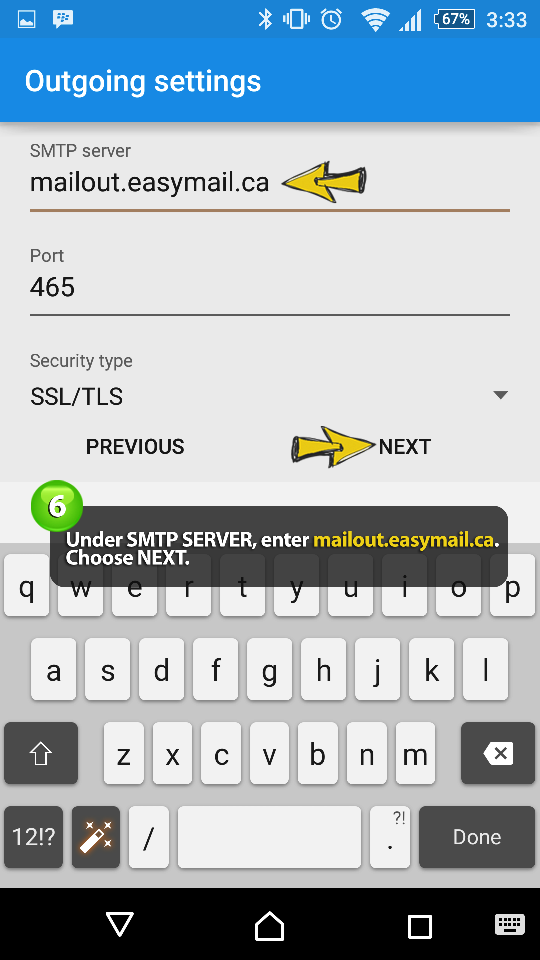
NOTE: For SECURITY TYPE we recommend SSL/TLS. The PORT should fill in automatically.
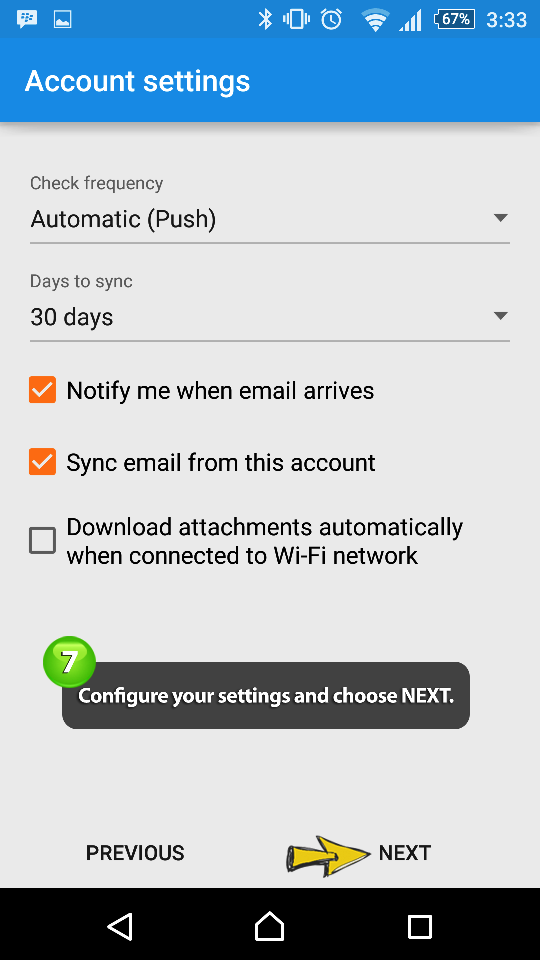
7. Configure your settings and choose NEXT
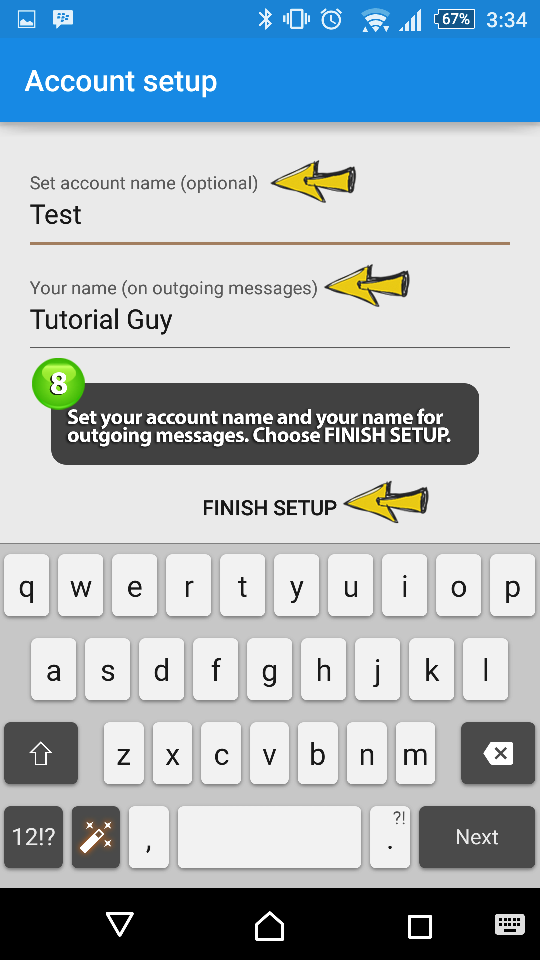
8. Enter your account name, name for outgoing messages, and choose FINISH SETUP.