
Our easyMail service is our hosted mail solution which allows you to access, send, and receive email via IMAP, POP or webmail. Please note that in order to make use of our easyMail feature domains will need to be subscribed to a service level that includes this feature.
Creating an easyMail User
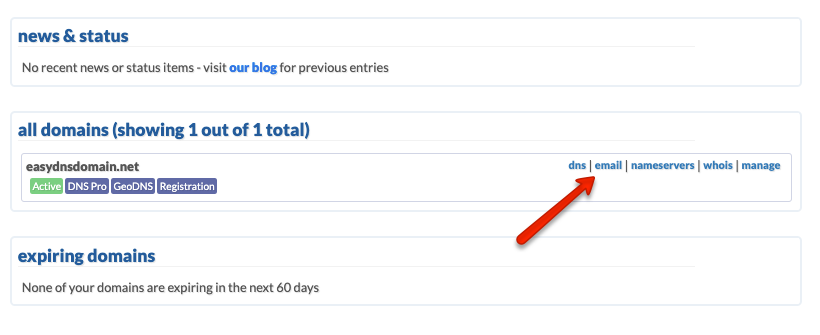
1. Log into your easyDNS account.
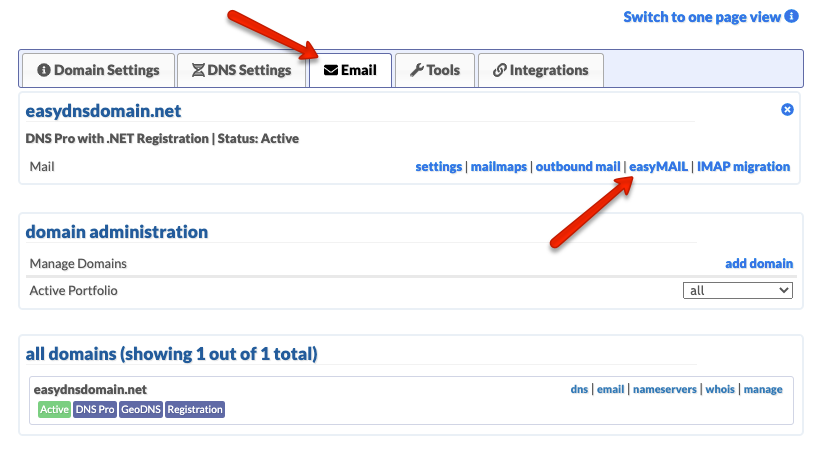
2. Click on EMAIL.
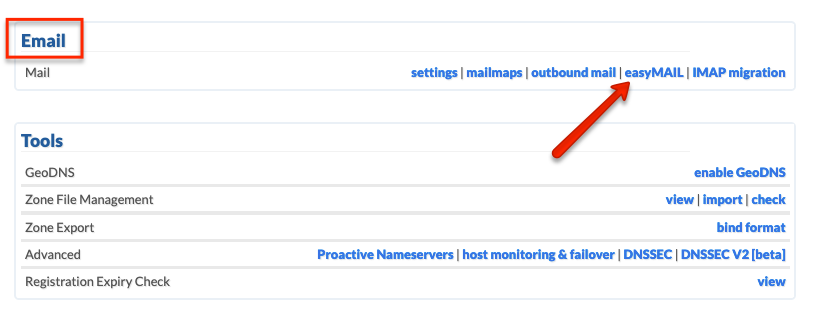
3. Click on the EASYMAIL.
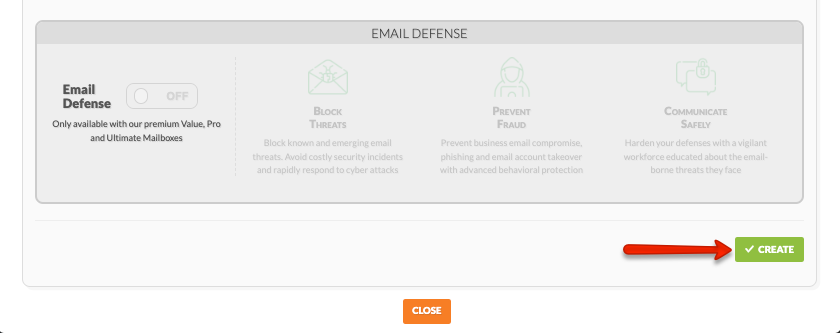
4. Click on the USERS tab and then click on CREATE ACCOUNT.
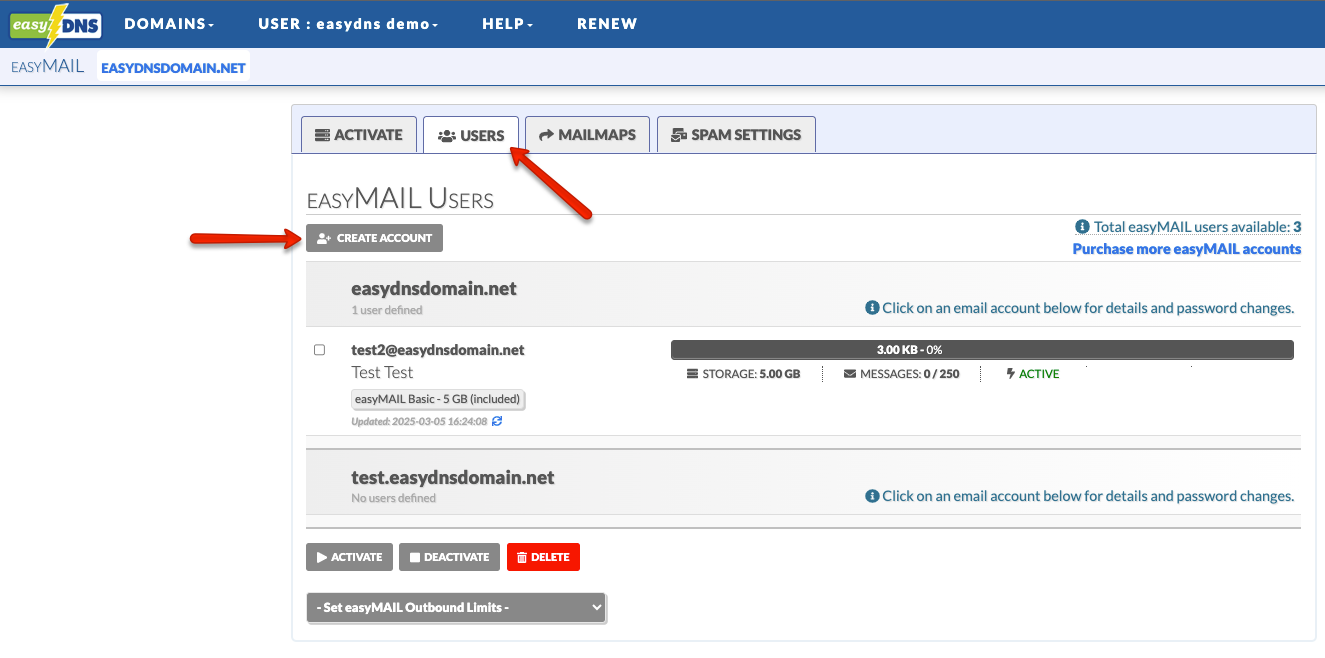
5. Enter all required information.
6. Click on CREATE.

You should now see the account you created under the USERS tab.
Enabling easyMail
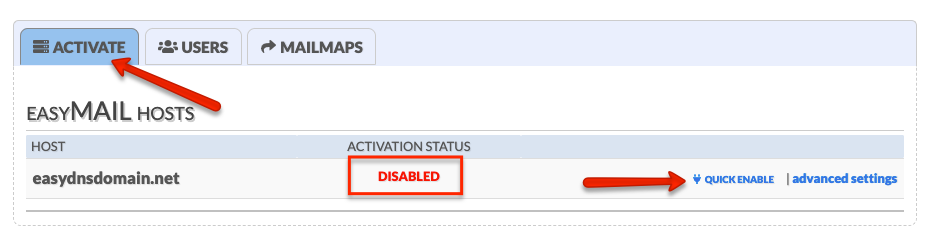
After creating your first account, you’ll now want to enable your easyMail service.
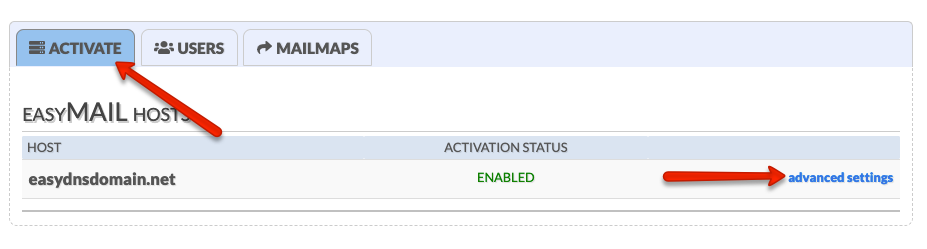
7. Click on the ACTIVATE tab and then click on QUICK ENABLE.
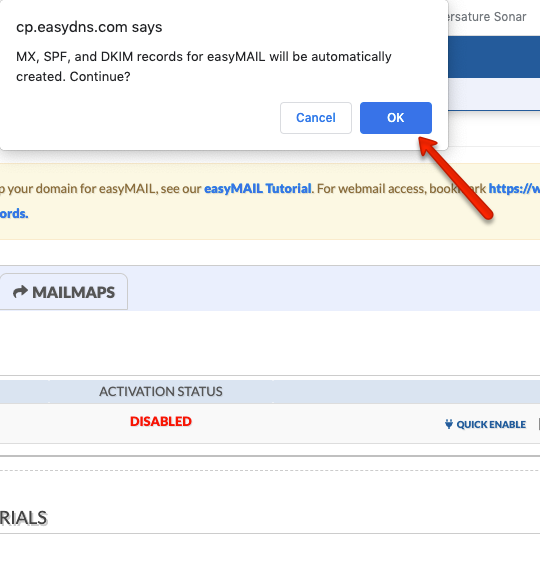
8. Click on OK for the pop up that appears.
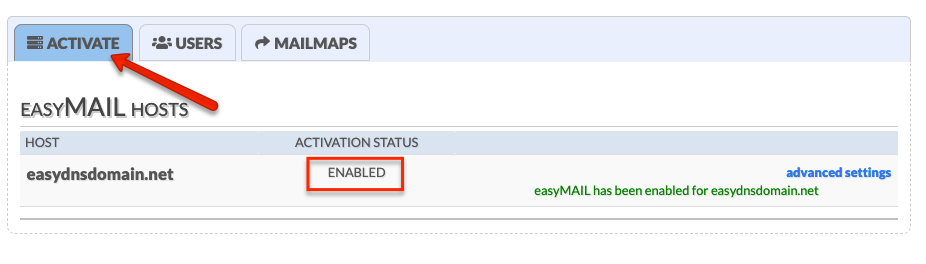
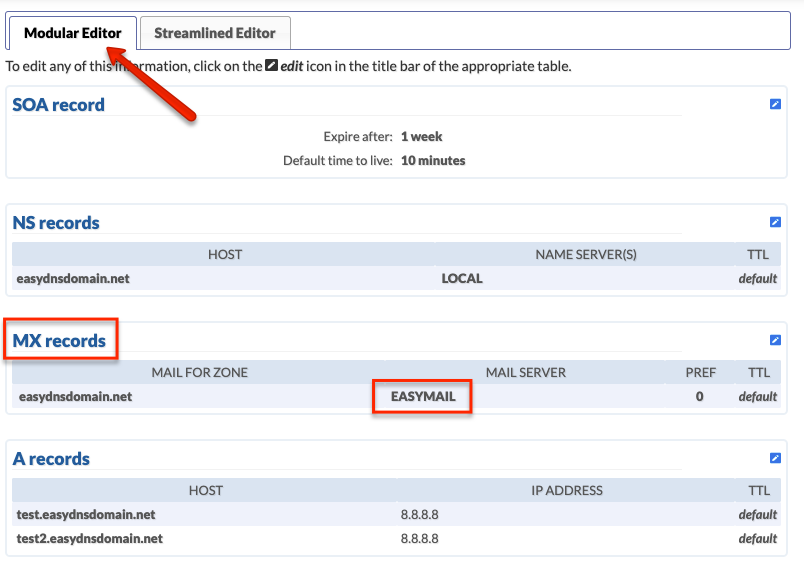
Once you’ve enabled your easyMail service, it should be ready to use. You can confirm this either by seeing the status as ENABLED or by checking your MX Record under your DNS SETTINGS page which should read EASYMAIL.
Postmaster Details, DKIM, and SPF
Once the easyMail accounts have been created and service enabled, you can access your Postmaster details along with enabling both DKIM and SPF checking.
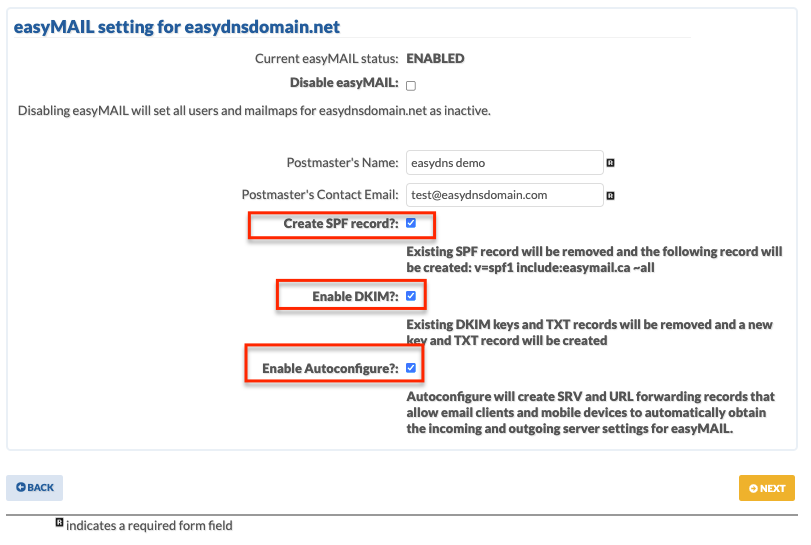
You can find out more about DKIM and SPF checking by going HERE.
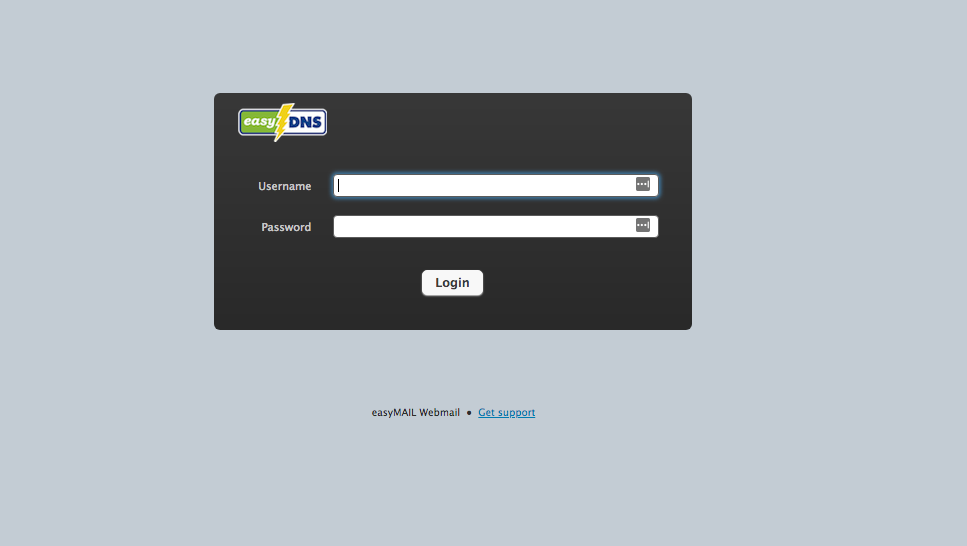
Accessing Your easyMail Account
Once the user has been created and service enabled, you will be able to access your account almost immediately through the webmail interface. We currently offer two webmail interfaces you can use:
RoundCube
https://messages.easymail.ca/
https://webmail.easymail.ca/
Horde
https://web.easymail.ca/login.php
*Your username will be the easyMail address you just created (example@yourdomain.com) and the password will be specific to the same address you’re trying to access.*
Setting Up easyMail On Other Devices, Email Clients, and DNS Providers
If you are looking to set up your easyMail account on third-party devices such as your Android / iPhone or e-mail clients like Outlook / Thunderbird, you will need the following information:
Inbound
• IMAP
Server Hostname: imap.easymail.ca
Server Port: 993 or 143
Username: yourname@yourdomain (e.g., me@example.com)
Security Settings: TLS, SSL, or none
The default port for SSL-enabled IMAP is port 993.
Port 143 is not a secure port and not recommended
***OR***
• POP
Server Hostname: pop.easymail.ca
Server Port: 995 or 110
Username: yourname@yourdomain (e.g., me@example.com)
Security Settings: TLS, SSL, or none
The default port for SSL-enabled POP is port 995.
Port 110 is not a secure port and not recommended
Outbound
• SMTP
Outbound Mail Server: mailout.easymail.ca
Username: your full easyMAIL address (e.g., me@example.com)
Password: your easyMAIL password
Ports: 465, 587, 2025, 20025 (port 25 is not recommended)
TLS (optional): 465 (SSL), 587, 2025, 2026, 20025, 20026
Storage Allowance
easyDNS has set firm quotas on mailbox storage size on per user basis
Pricing for individual mailboxes:
- Under 5GB included with all easyMAIL mailboxes
- Between 5GB and 15GB is $2.50/month
- Between 15GB and 50GB is $12.50/month
- Between 50GB and 75GB is $20.25/month
- Between 75GB and 100GB is $25/month
- Between 100GB and 125GB is $31.25/month
- Between 125GB and 150GB is $40.50/month
Please contact us if you need more than 150GB in storage for your e-mail address
*billing is in USD’s
NOTE: To use easyMail with other DNS providers, please specify our easyMAIL MX record within your DNS settings:
MX.EASYMAIL.CA
Pref: 0
This server is not to be used for IMAP or POP connections, ONLY for the MX record.