|
Secondary DNS with DNS Made Easy as Primary
Posted by Shaker B. on 28 October 2016 11:13 AM
|
|
| Before beginning to set up your Secondary DNS service with easyDNS, you’ll want to log into both your Primary DNS provider (DNS Made Easy) and your easyDNS account.
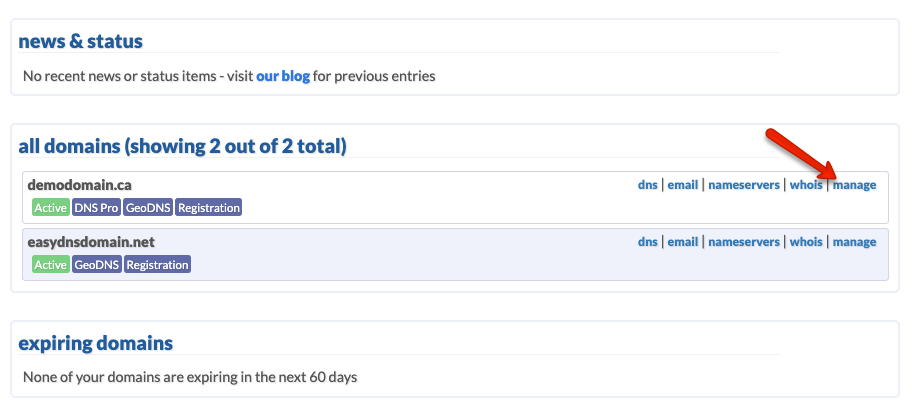
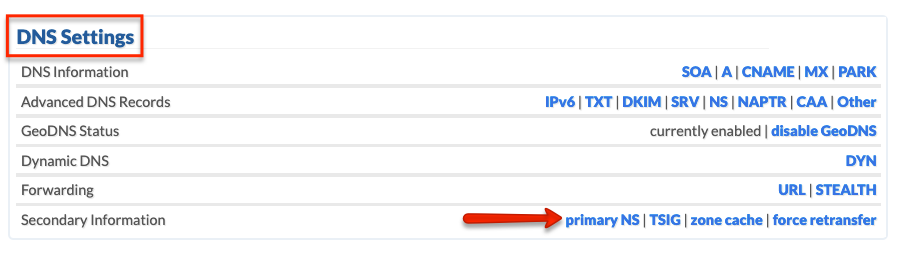
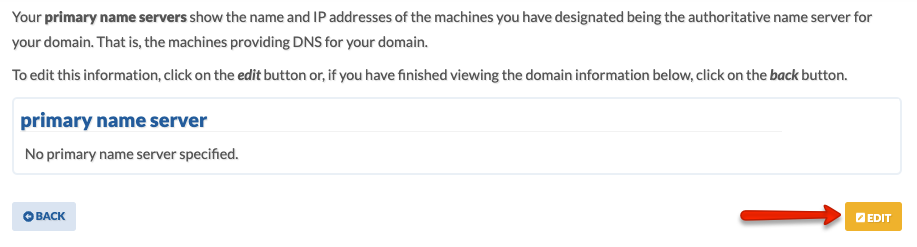
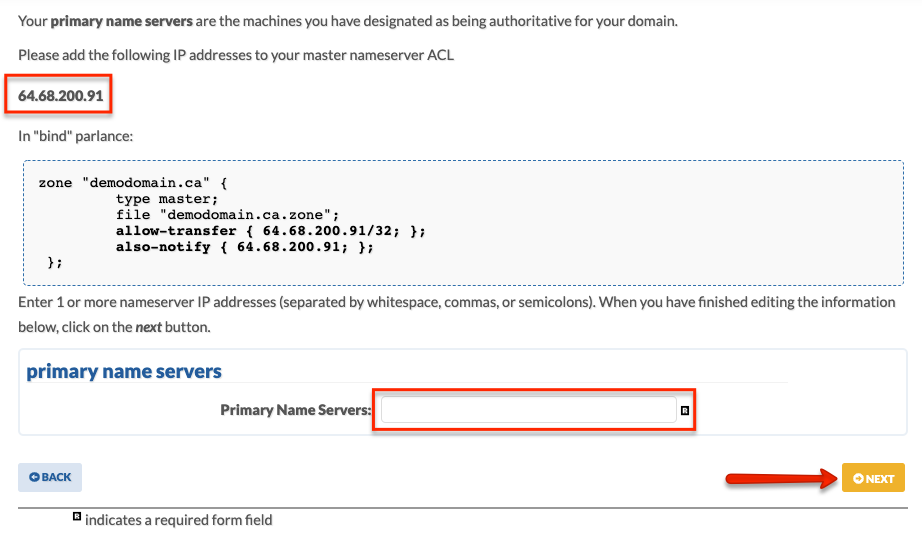
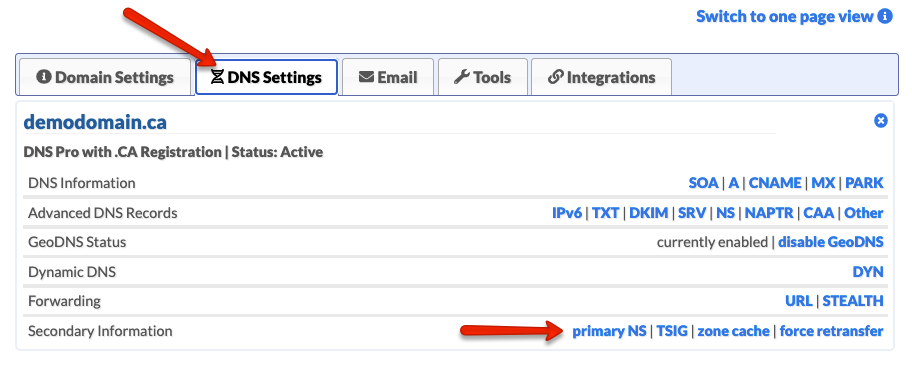
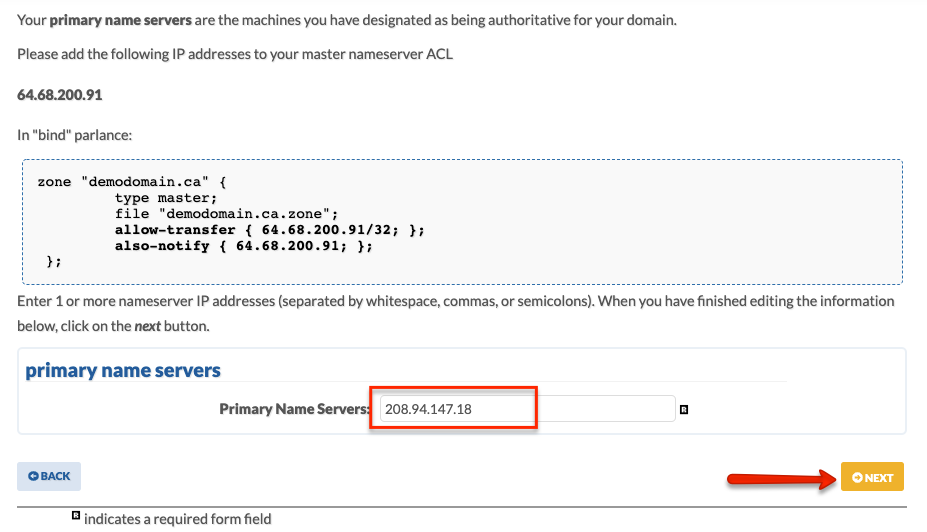
Within Your easyDNS Account 1. Log into your easyDNS account. 3. Click on PRIMARY NS under DNS SETTINGS. 4. Click on EDIT. 5. You will need to enter your DNS Made Easy primary IP addresses along with entering easyDNS IP addresses within your ACL list with DNS Made Easy. Within Your DNS Made Easy Account 1. Log into your DNS Made Easy account.
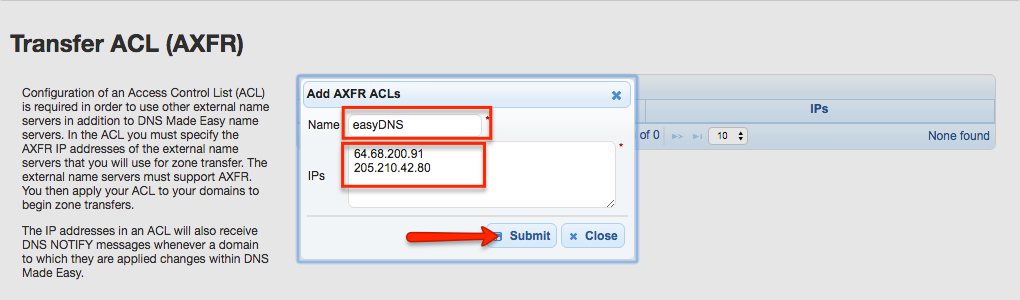
3. Click on ‘+’.
4. Enter a name and your easyDNS IP addresses.
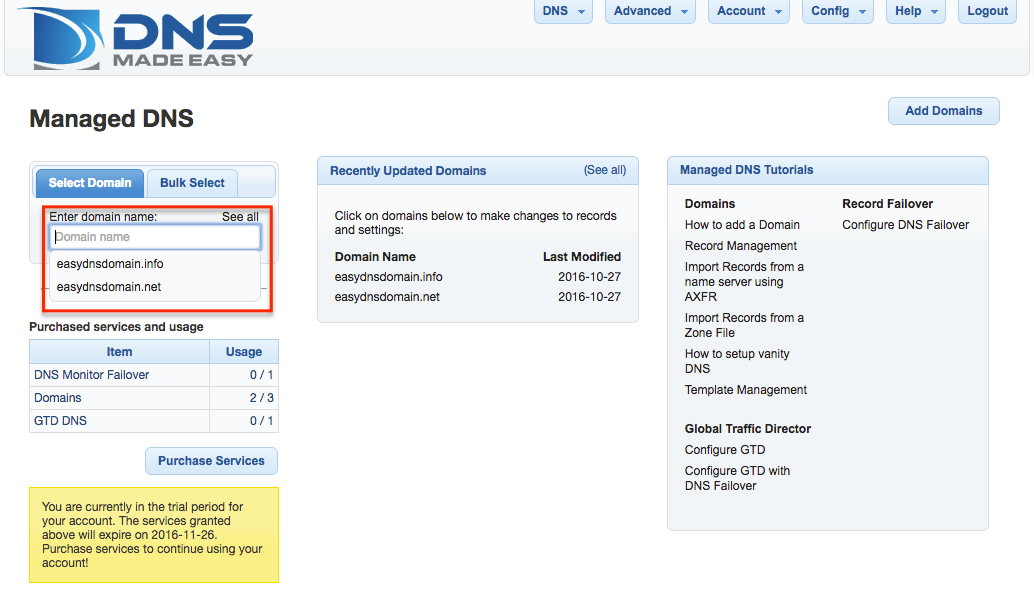
6. Click on DNS and choose MANAGED DNS.
7. Enter or select your domain name.
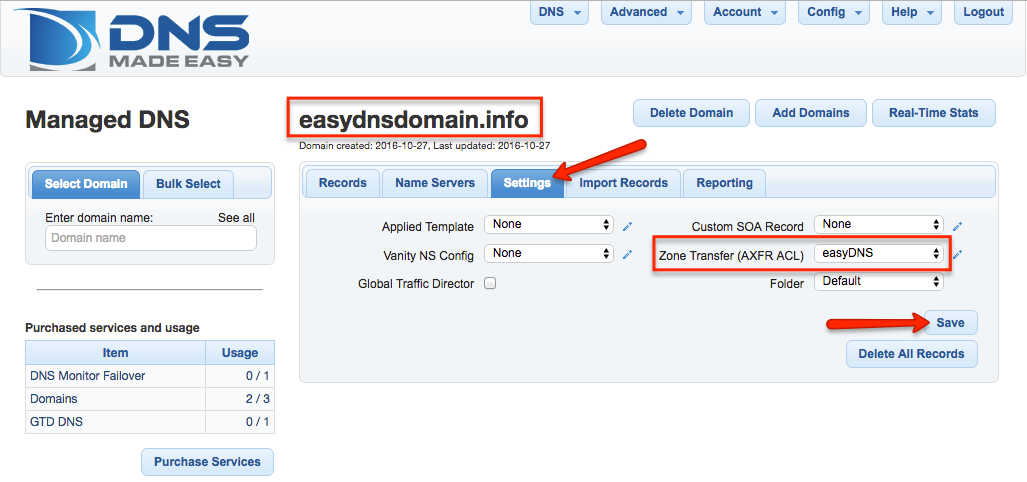
8. Click on the SETTINGS tab.
11. Click the NAME SERVERS tab and copy the IP address listed for AXFR SERVER.
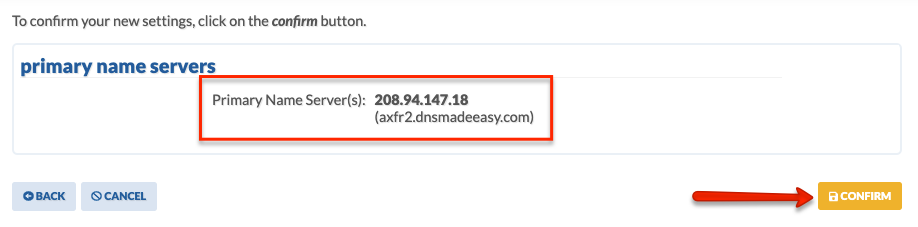
Within Your easyDNS Account 1. Go back to your Secondary DNS settings page. 3. Confirm your changes. NOTE: You may get a warning about your hostname not resolving. Please note that this may not apply to you. You can verify this by checking to see if easyDNS is storing your zone cache.
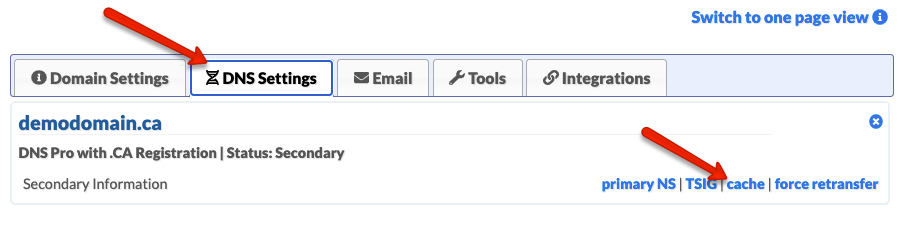
4. You should now be able to see your zone from your primary by clicking on CACHE.
|
Secondary DNS With DNS Made Easy As Primary
Knowledgebase