
Users now have the ability to install SSL certificates directly from within their cPanel/easyWEB account. This can be accomplished either with a certificate purchased from a third party or directly from easyDNS. For the purposes of this article we’ll be covering how to install a certificate purchased from easyDNS. If you already have a certificate you can skip to the Installing the SSL Certificate section below.
You’ll need to begin the process by logging into your cPanel account and clicking on the SSL/TLS icon within the SECURITY section. You’ll also want to make sure to open up a NotePad or Text Editor type program which you’ll be using during this process.
![]()
GENERATING A PRIVATE KEY
1.Click the GENERATE, VIEW, UPLOAD OR DELETE… link under PRIVATE KEYS
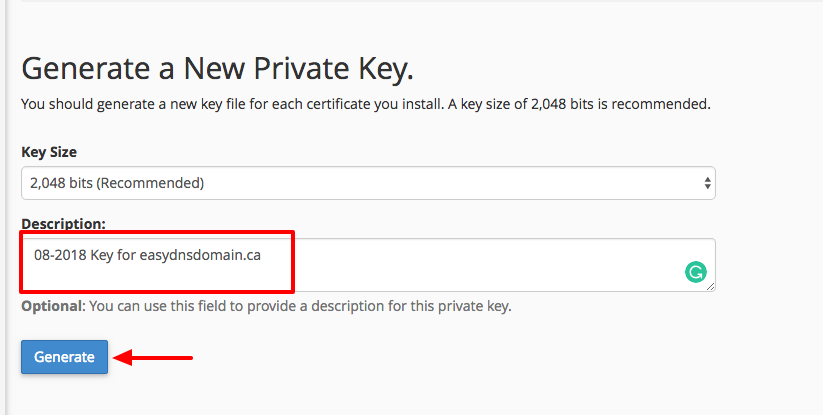
 2. Leave the Key Size at 2048 and type in a description. (If there are multiple keys present already, use a description you’ll remember).
3. Click on GENERATE.
4. Highlight and copy everything in the ENCODED PRIVATE KEY section, including the “—–BEGIN RSA PRIVATE KEY—–” and “—–END RSA PRIVATE KEY—–” to your Text Editor program.

5. Scroll to the bottom and click GO BACK, then scroll to the bottom again and click RETURN TO SSL MANAGER.
GENERATING A CSR
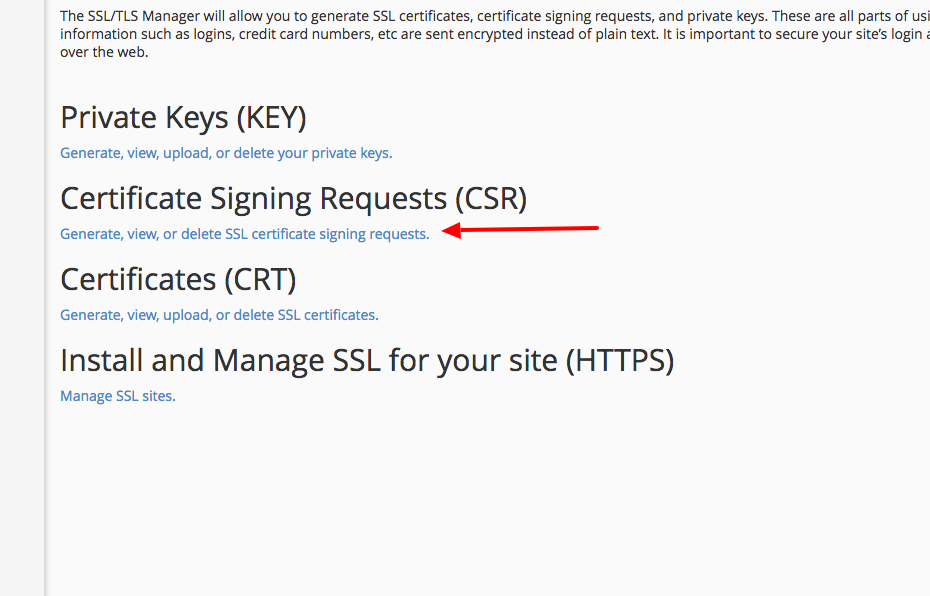
6. Click on the GENERATE, VIEW, OR DELETE…. link under CSR
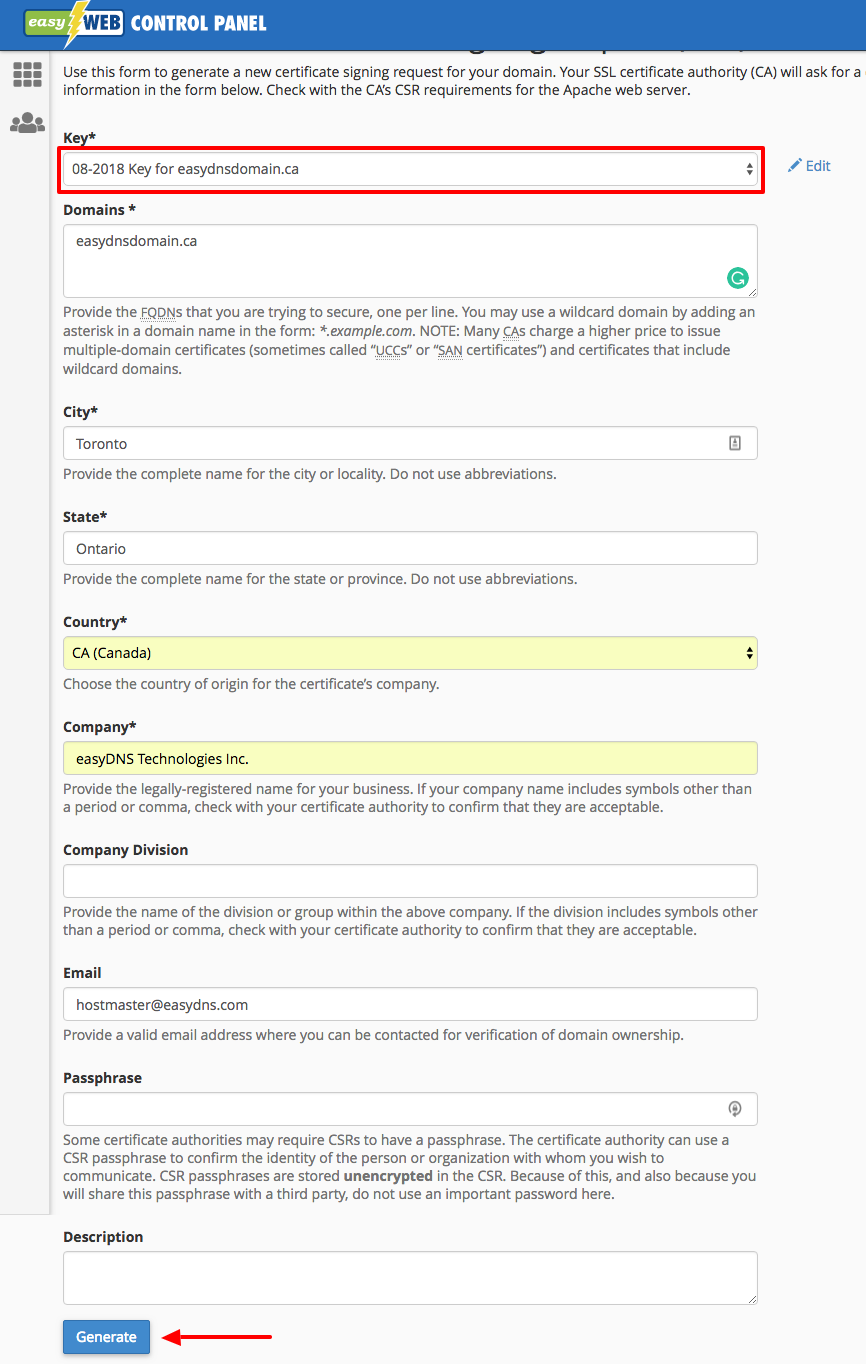
7. Click the drop-down field (Key*) and select the Private key with the description you created.
8. Fill in all the required fields with your information. (If your web browser happens to fill the Passphrase field, delete it and leave it blank).
9. Click GENERATE at the bottom.
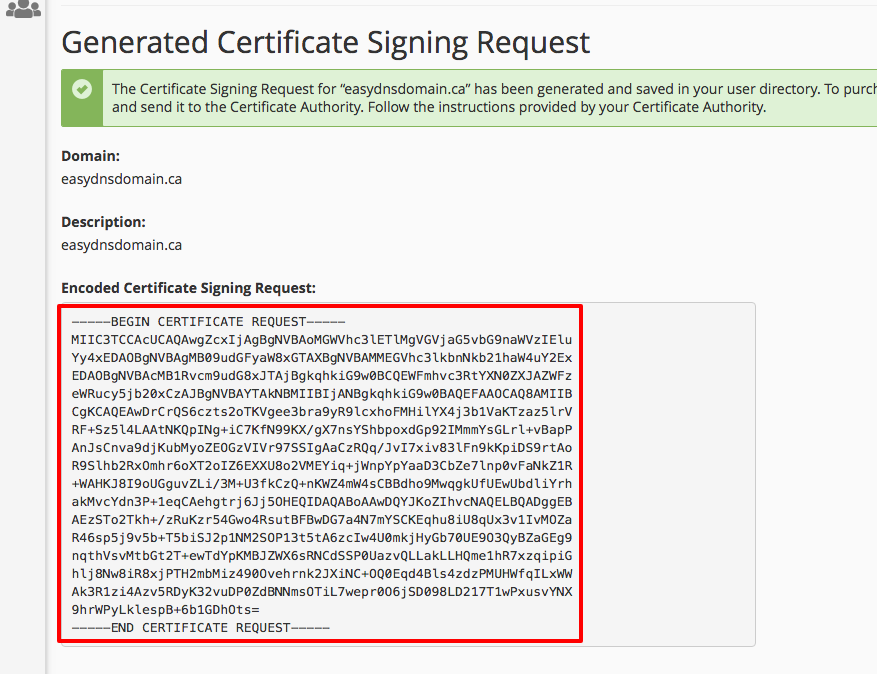
10. Highlight and copy everything in the ENCODED CERTIFICATE SIGNING REQUEST field including the “—–BEGIN CERTIFICATE REQUEST—–” and “—–END CERTIFICATE REQUEST—–” lines into your Text Editor program.
11. Scroll to the bottom and click GO BACK, then scroll to the bottom again and click RETURN TO SSL MANAGER.
ORDERING AN SSL CERTIFICATE
12. Log into your easyDNS account.
13. Under USER go to SSL CERTS & TRUST.
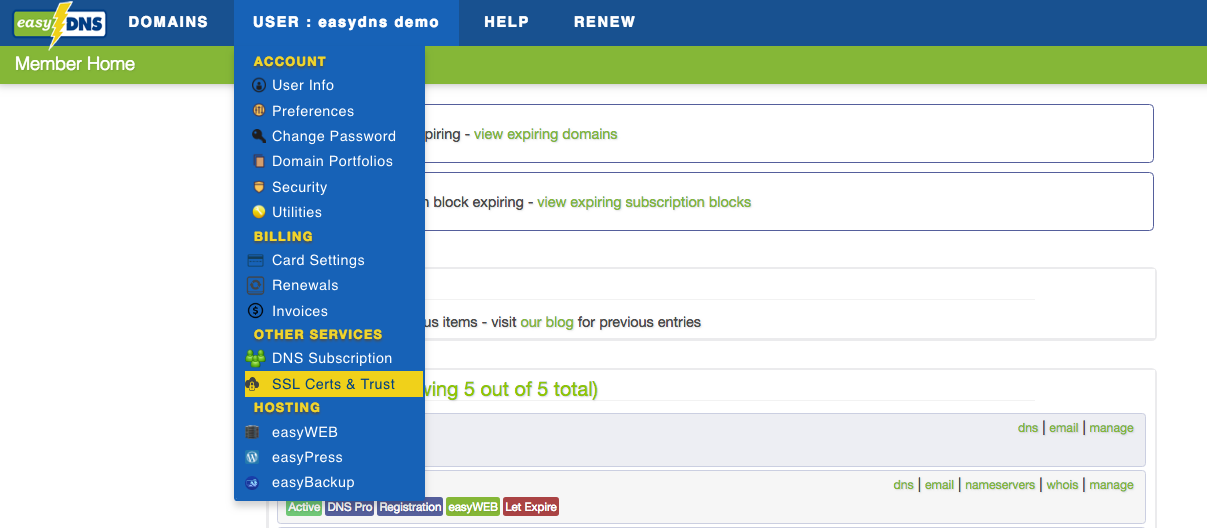
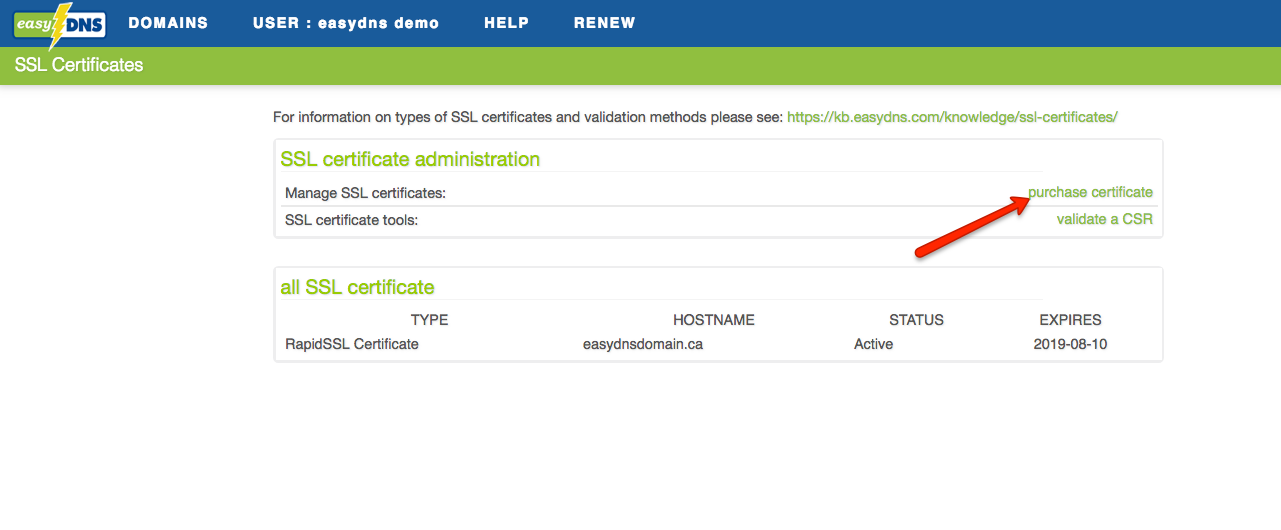
14. Click on PURCHASE CERTIFICATE.
15. Select your domain in the SELECT A DOMAIN drop-down menu or manually enter your domain/subdomain
16. Select your SSL certificate.

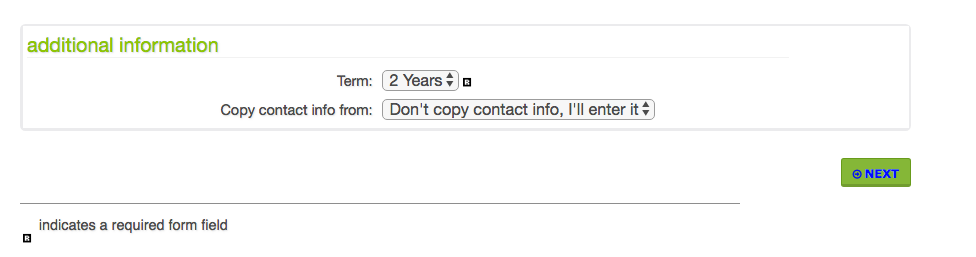
17. Select the term for the certificate and how you would like to enter your contact details.
18. Click on NEXT.
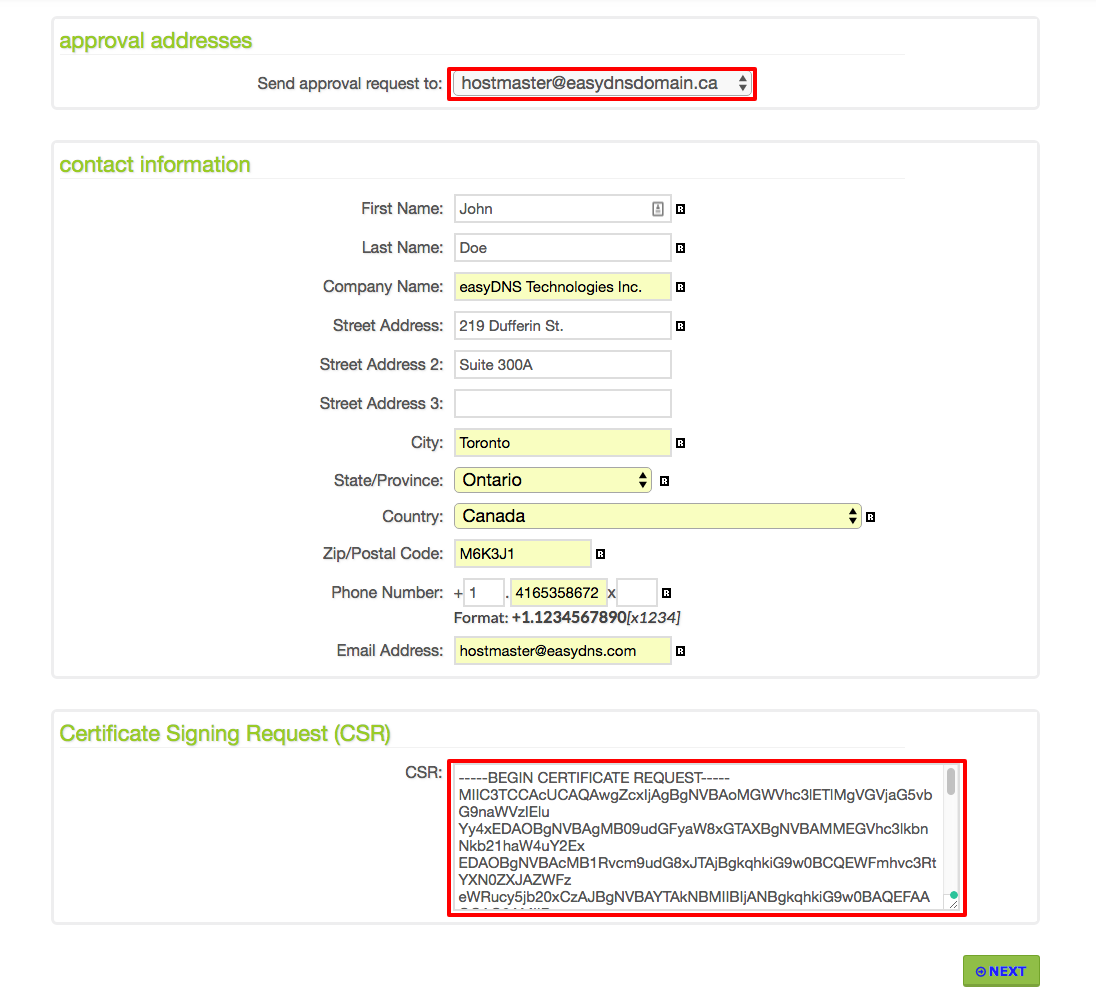
19. Select an APPROVAL ADDRESS from the list provided. Please note that due to the GDPR policy the addresses that appear within the WHOIS data are privatized for the majority of domain names. As such approval emails will usually need to go to one of the generic options provided:
admin@domain.com
administrator@domain.com
hostmaster@domain.com
webmaster@domain.com
postmaster@domain.com
If the WHOIS information is visible to the public and can be parsed, the Admin Contact email address will show up in the list.
20. Copy and paste the CSR you created earlier and saved on your Text Editor.
21. Click on NEXT.
Once the invoice is paid, the order will be submitted, and an email from the Certificate Authority will be sent to the specified Approval address a short time later. Follow the instructions in the email.
If it is a Domain Validated certificate, you’ll receive the fulfilment email a short time after you’ve done the Approval confirmation.
If it is a certificate which requires Approval email and a call, then the Certificate Authority will attempt to call the number listed in the order details.
Please also note that depending on the SSL certificate selected, the validation process can sometimes take up to a week due to the Certificate Authority’s procedures. You can see the different validation processes within each certificate summary HERE.
Once the Approval email process is completed, you will receive another email with the actual certificate to the address specified within the contact information during the SSL purchase.
INSTALLING THE SSL CERTIFICATE
22. Log back into your cPanel/easyWEB account.
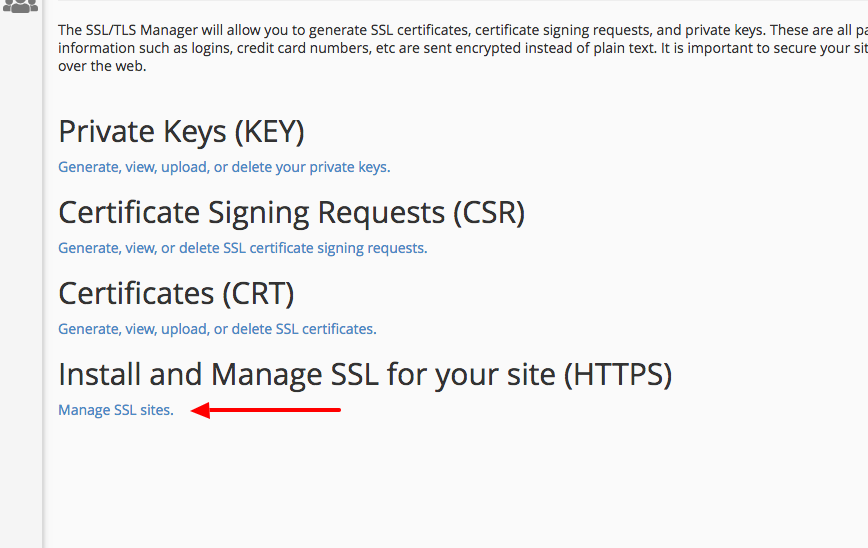
23. Click on the SSL/TLS icon under SECURITY.
![]()
24. Click on the MANAGE SSL SITES link.
25. Click the drop down menu for DOMAIN and select “domain.tld (+subdomains: mail, www)”
26. In the Fulfilment email from Certificate Authority, copy the certificate information which includes “—–BEGIN CERTIFICATE—–” to “—–END CERTIFICATE—–“. and paste it into the “Certificate: (CRT)” field.
27. Go to your Text Editor and copy the Private Key information and paste the Private Key, including the “—–BEGIN RSA PRIVATE KEY—–” and “—–END RSA PRIVATE KEY—–“, into the “Private Key (KEY) field.
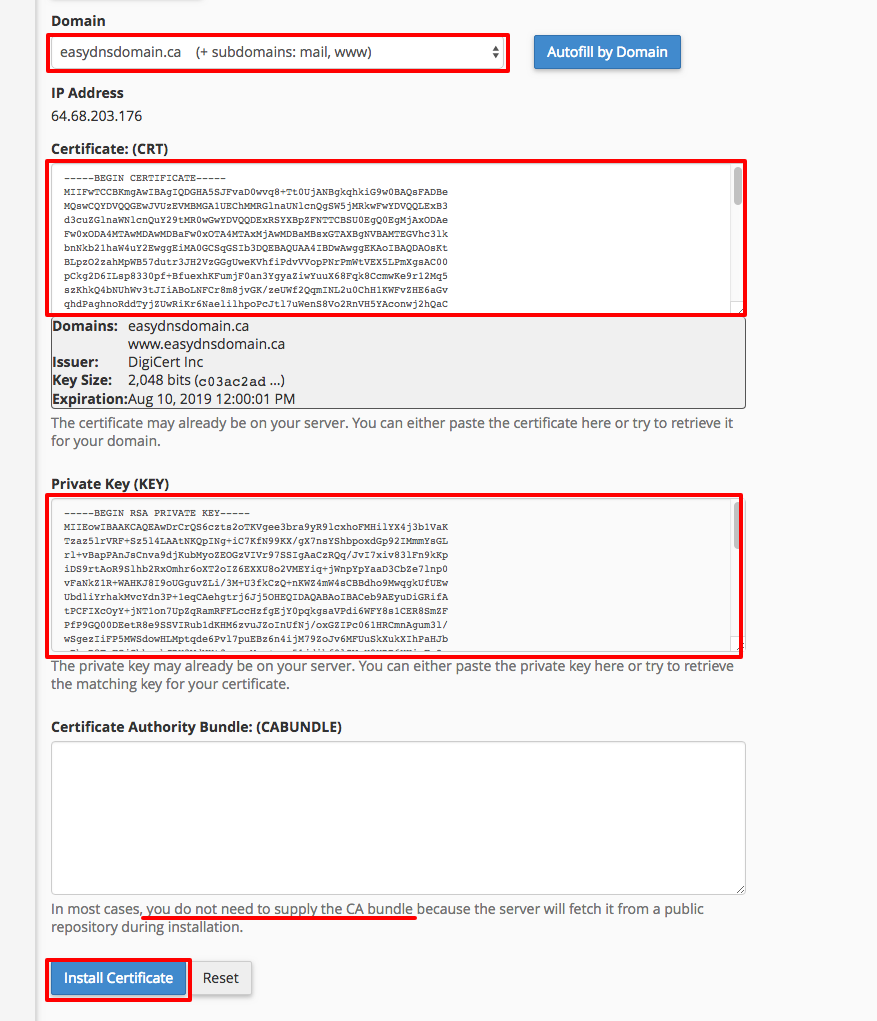
28. Click the INSTALL CERTIFICATE button at the bottom of the page.
29. Click OK on the pop-up window.

30. You can see the details of your certificate under the MANAGE INSTALLED SSL WEBSITES section by clicking the CERTIFICATE DETAILS link to review.

At this point your SSL certificate should be successfully installed. However if you continue to experience issues, please contact our Support team.