
To install and use the Windows Workstation with easyBackup, you’ll want to do the following:
- Log into your easyBackup account page HERE.
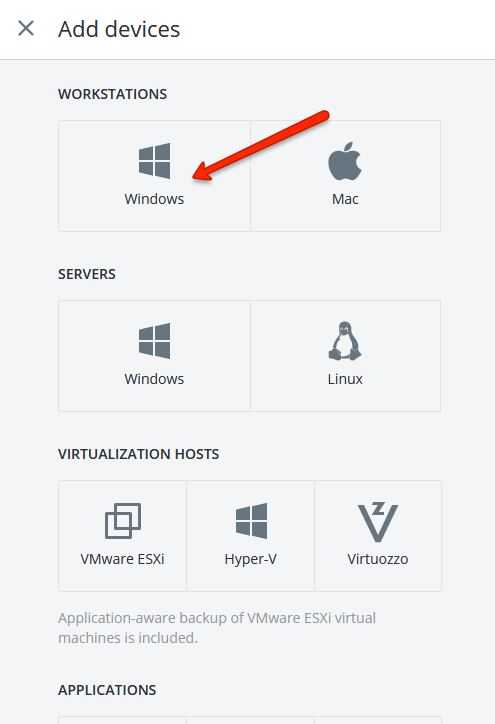
- Click on the ADD button.
- Under WORKSTATIONS, click on WINDOWS
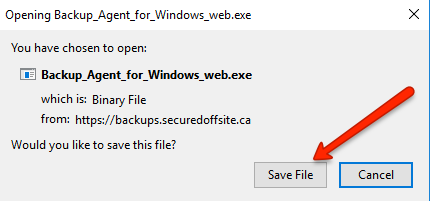
- Click on SAVE FILE
- Run the saved file and install the agent
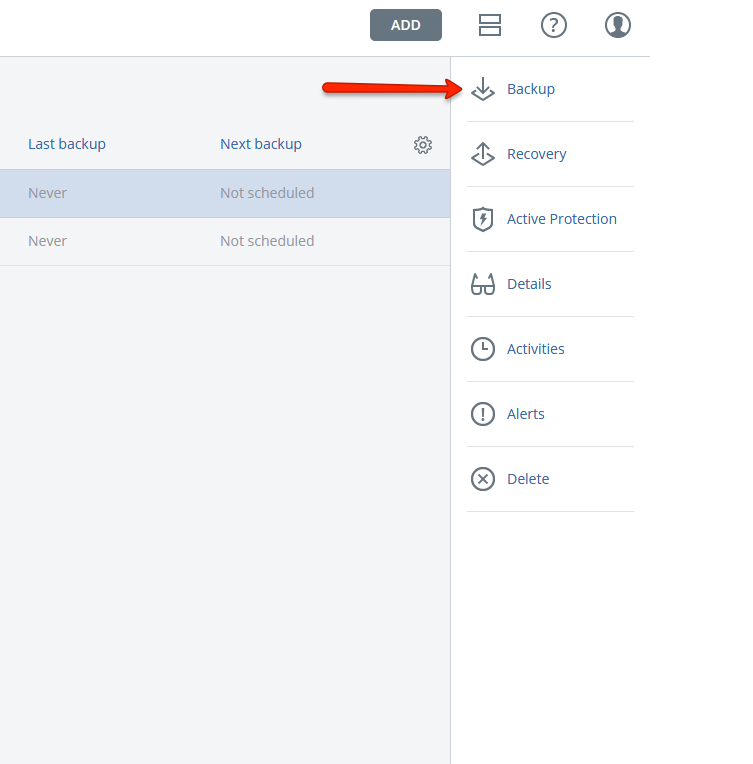
- Once the installation is complete, enable BACKUPS on the task bar or in the web interface
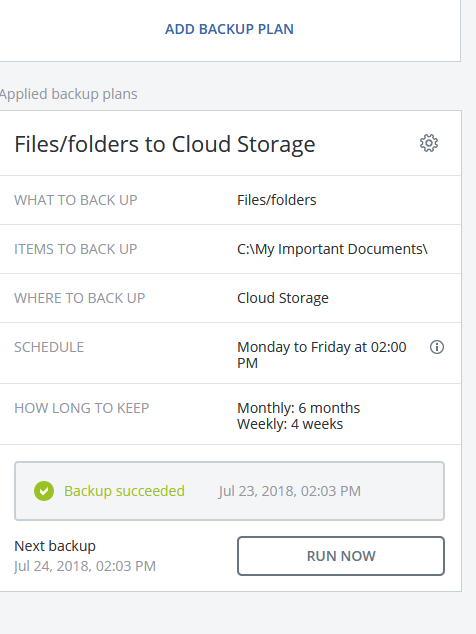
- Choose your settings and click CREATE
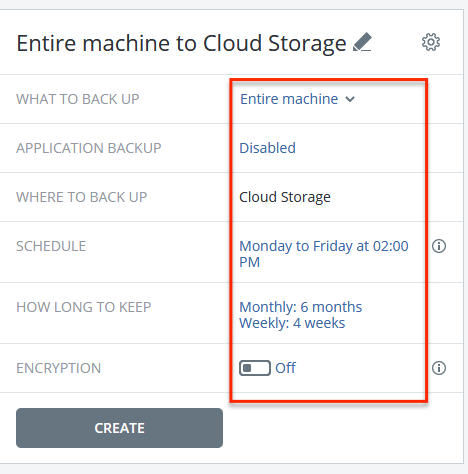
- After you’ve done this, it’ll look something like this:
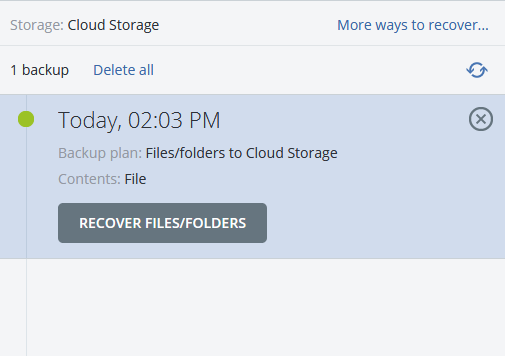
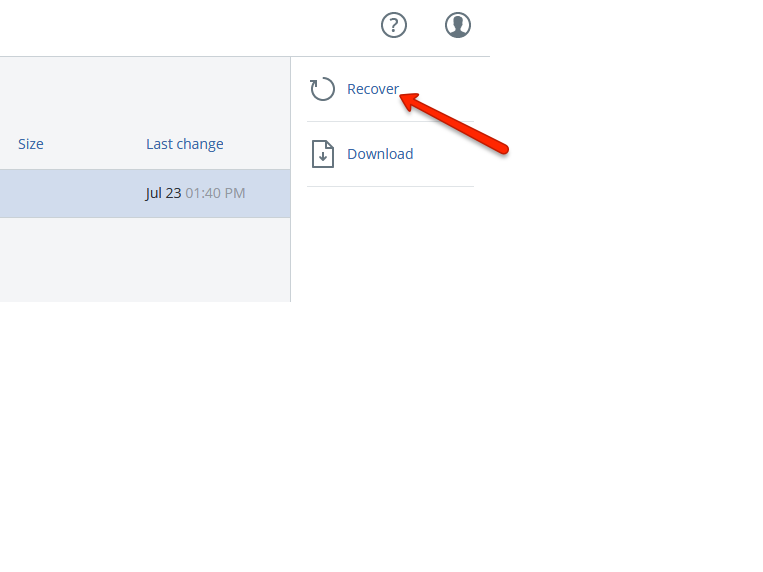
- If you delete your files on your local machine and want to recover them, click on RECOVERY. In the RECOVERY window that comes up click on RECOVER FILES/FOLDERS.
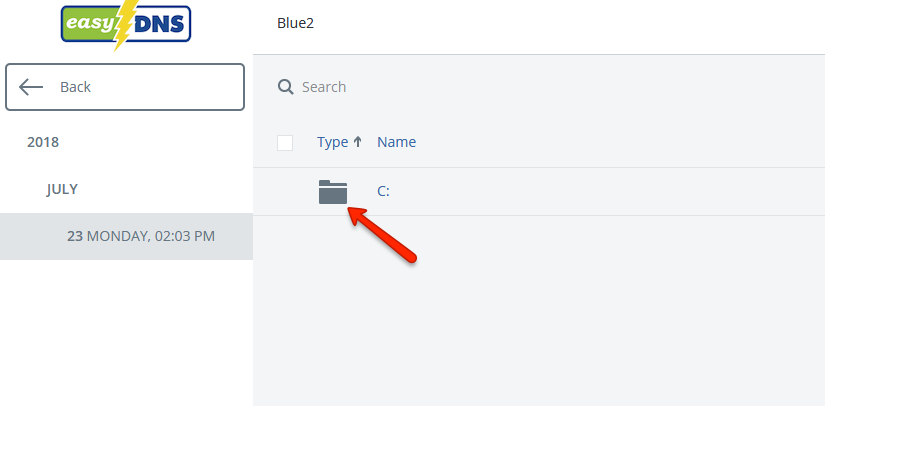
- Double click on the C FOLDER
- In this case I want to recover all the documents in the folder, so I select it.
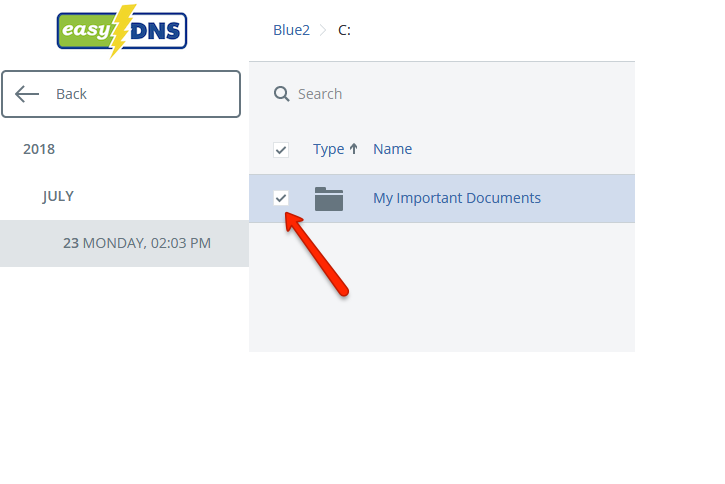
- Click on RECOVER in the pane to the right.
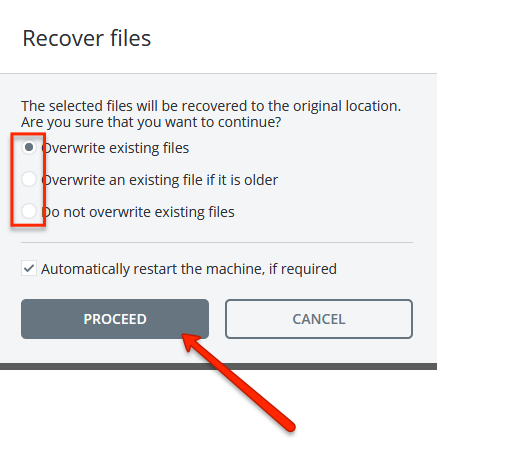
- Choose your recovery location and click on START RECOVERY.
- Select your settings in the dialog box and click on PROCEED.
- Upon the completion of the recovery, you’ll see something like the following in the pane to the right:
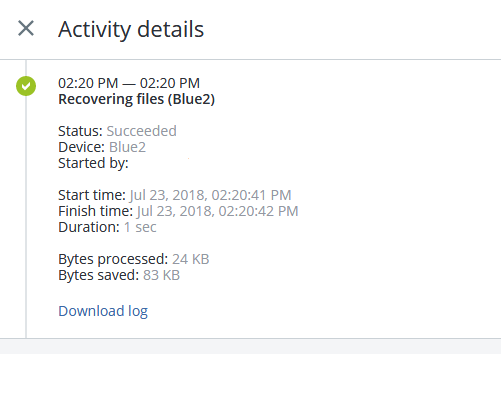
- You can then close the above and your recovery is complete.