DNS-based Authentication of Named Entities (DANE) is a method of authenticating the identity of internet endpoints using DNS. It lets you map X.509 certificates used in TLS encryption to domain names.
Simply put DANE is a way to anchor trust certificates (like TLS / SSL certs) within one’s own zone using TLSA RR’s. Doing so precludes the reliance on using a third-party Certificate Authority and thus mitigates against the vulnerability of a given CA being compromised (of which there have been a few).
DANE can remove the need to use a central Certificate Authority (CA), however it can still be used in conjunction with one. This is accomplished via the TLSA RR, which is described in the RFC 7671.
The format of the TLSA RR is:
(PORT).(PROTOCOL).(OWNER-NAME) IN TLSA (USAGE) (SELECTOR) (TYPE) (DATA)
Port: The port corresponding to the service to be secured
Protocol: Usually _tcp
Usage: This is certificate usage and has one of the following values:
0 – CA Constraint or PKIX-TA. There must be a trust path to a trusted third-party CA.
1 – Service Certificate Constraint and PKIX-EE. A certificate that must match the TLSA record and pass PKIX validation.
2 – DANE-TA/Trust Anchor Assertion. The certificate has a valid certification path to the certificate mentioned in the record but PKIX is not required.
3 – DANE-EE/Domain-issued certificate. A self-signed record that is not tied to a CA.
Selector: Determines which part of the certificate should be checked:
0 – The entire certificate
1 – Just the public key
Type: What type of data in the cert should be matched when checking:
0 – The entire information in the certificate
1 – a SHA-256 hash of the data
2 – a SHA-512 hash of the data
For example, the following code would present TLSA validation for mx.example.com, a mail server on port 25 using TCP, with a self-signed TLS certificate that is not connected to a third-party CA, which should be compared to a SHA-256 hash of the public key portion of the certificate:
$ORGIN example.com.
_25._tcp.mx IN TLSA 3 1 1 5af9bc735736d0351a68819684960b8404299ef1b56db04cc6ffb668a28a6a9
To create a TLSA record within your easyDNS account, please do the following:
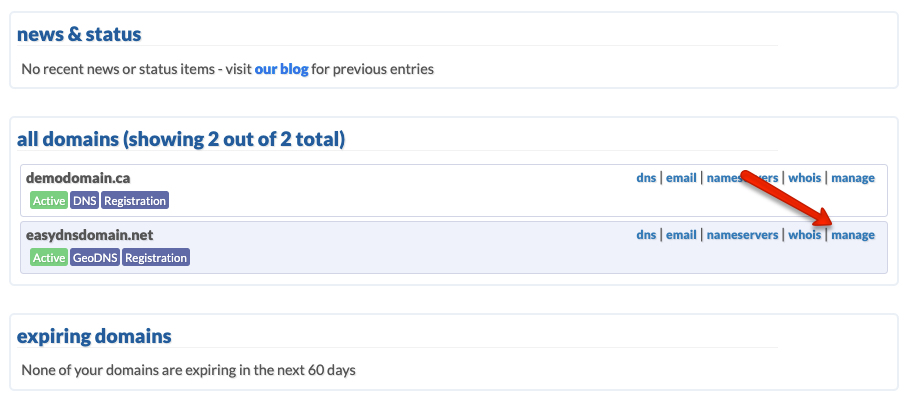
- Log into your easyDNS account.
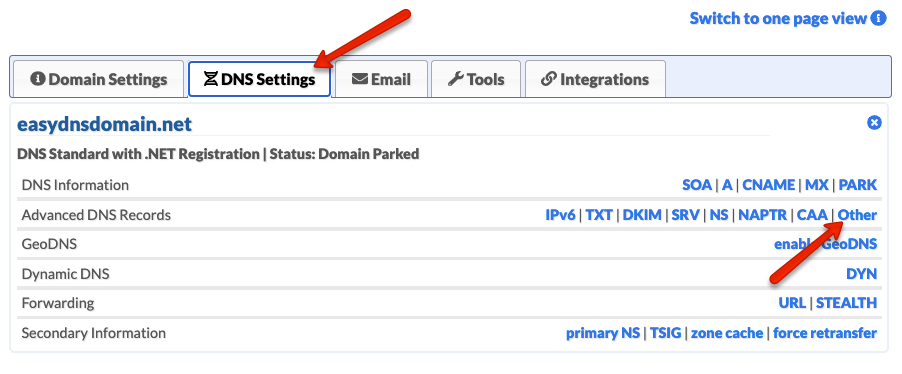
- Click on MANAGE.
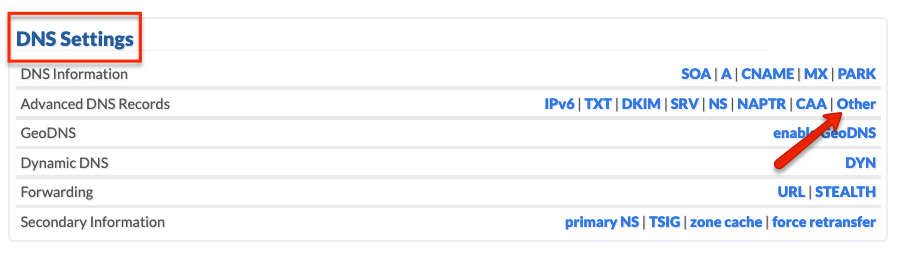
- Click on OTHER under DNS SETTINGS.
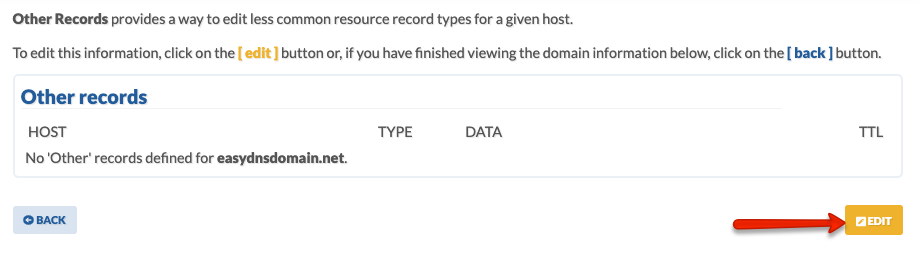
- Click on EDIT.
- Enter your HOST, select TLSA, and enter your DATA. Click on NEXT.
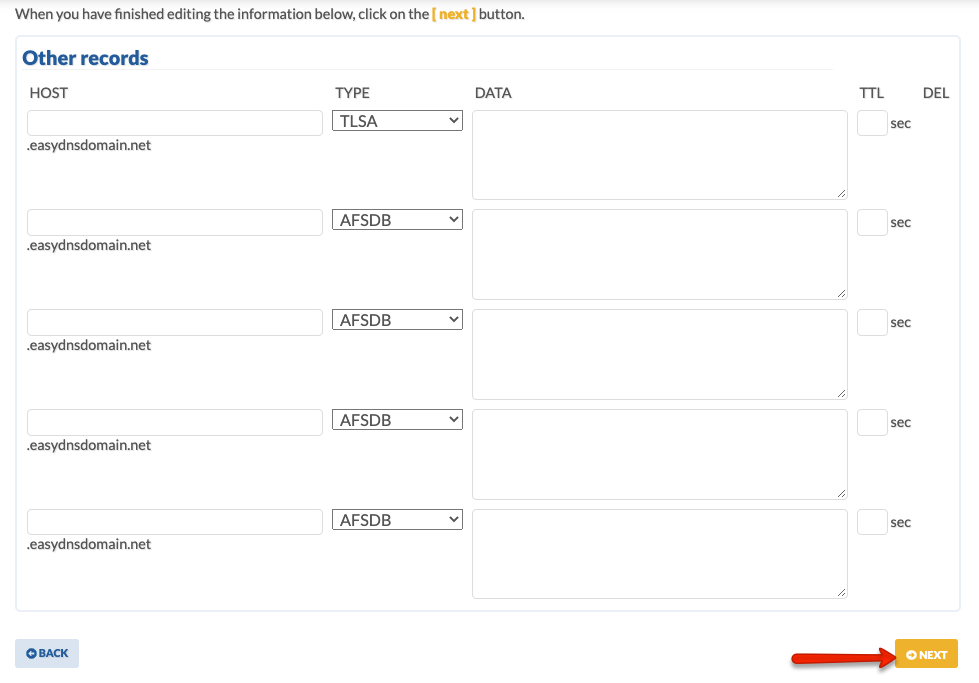
- Confirm your changes.
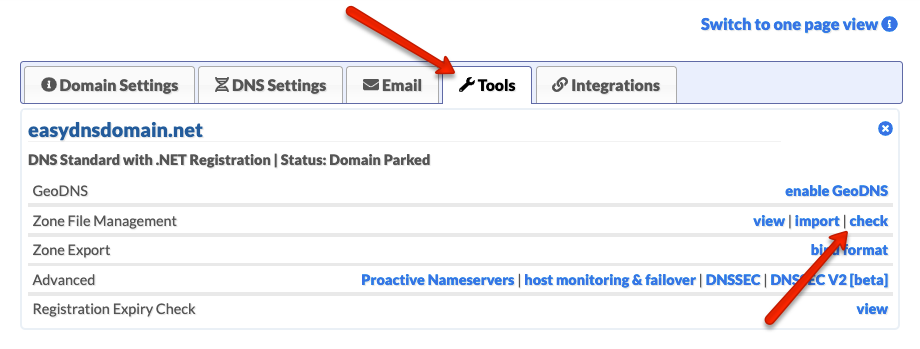
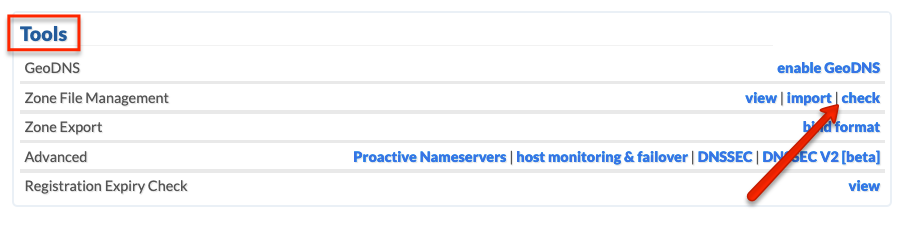
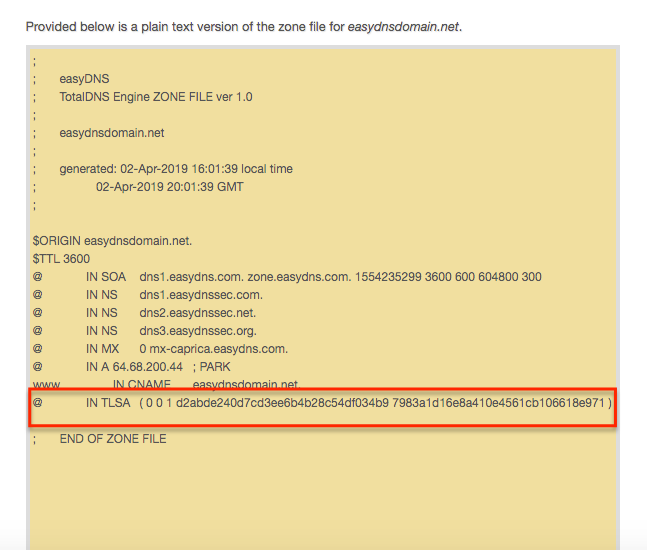
Your TLSA settings should now be live. You can double check via the CHECK tool within your control panel: