
Once you’ve gone through the process of signing up for an easyWEB service and assigned it to a domain name, you’ll need to connect the two together through the domain’s DNS settings. This is how the Internet knows where to go in order for your visitors to see your actual website.
In order to connect the two together, you’ll need to enter the easyWEB IP address that gets sent in an automated email when you first sign up for this service. If you are unsure of what this IP address is, you can either resend the original email to yourself or simply just copy the information right from within your easyDNS account.
You’ll want to do the following:
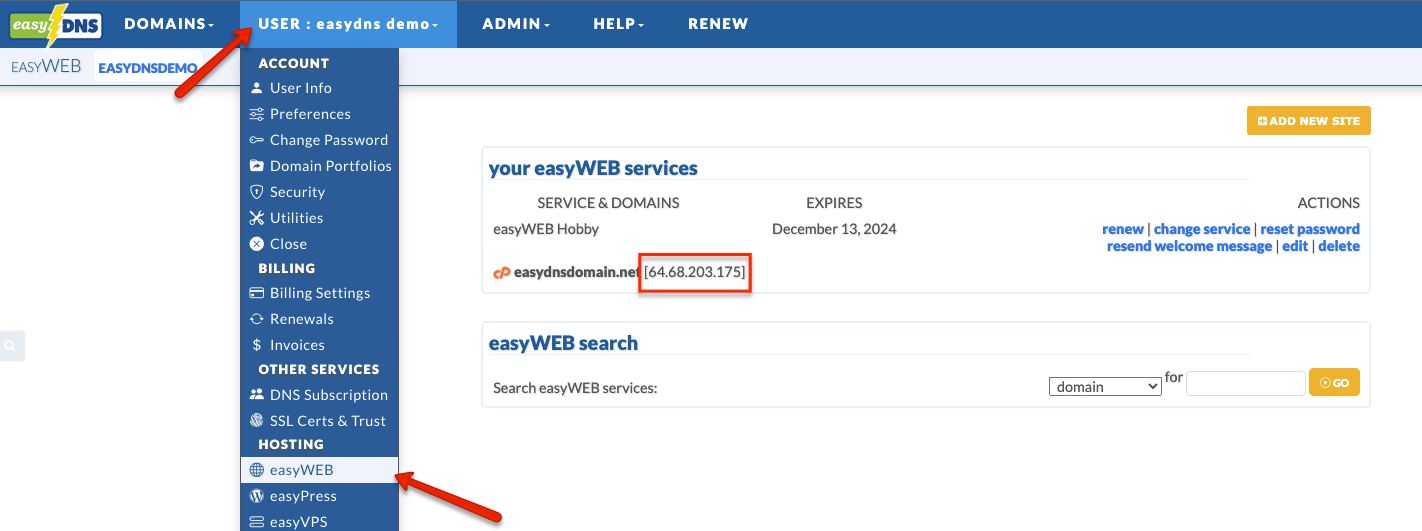
1. Log into your easyDNS account
2. Copy the IP address for your subscription under the EASYWEB portal
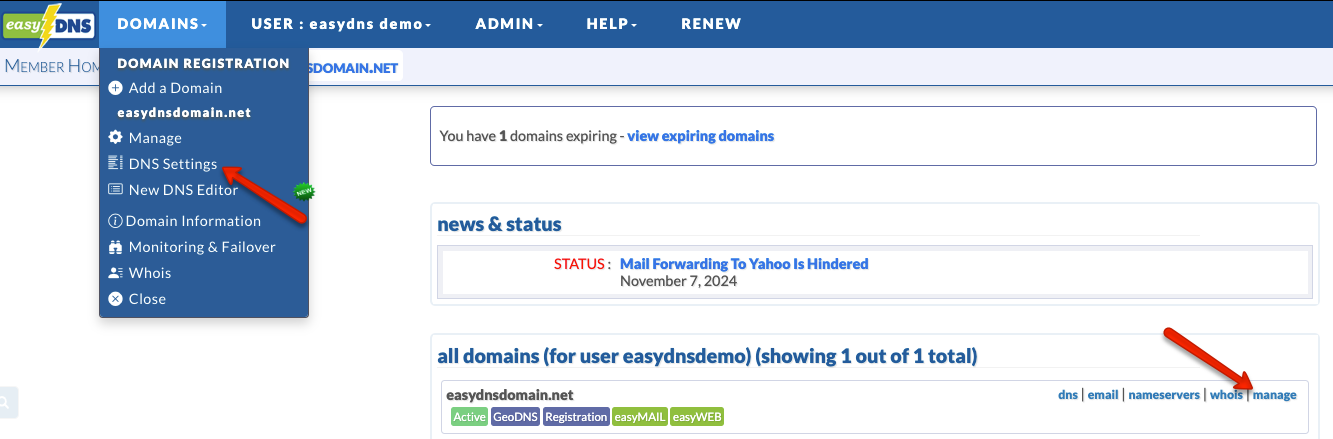
3. Select your domain by clicking on MANAGE. Click on DNS SETTINGS.
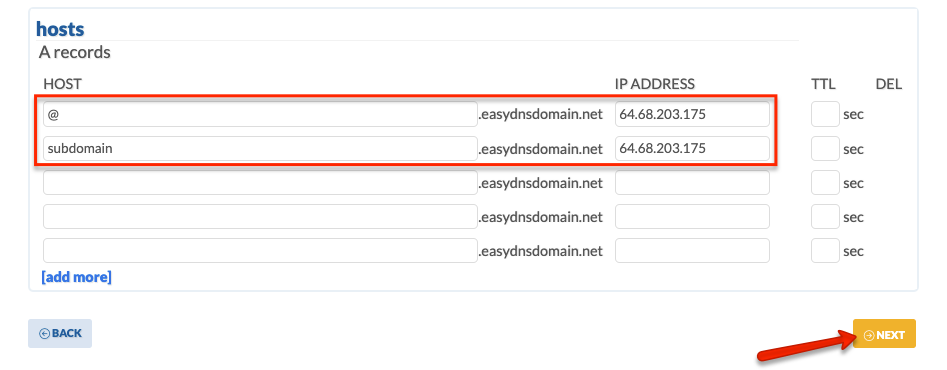
4. Click on the EDIT icon for A RECORDS

5. Enter ‘@’ under HOST for your domain name OR the subdomain for your subscription. Paste the IP address under IP ADDRESS
6. Click on NEXT and confirm your changes.
Your domain name should now be connected to your easyWEB subscription. Note that the changes may take a few hours to finalize.